"Vancouver Marina" by Ken Costello
|
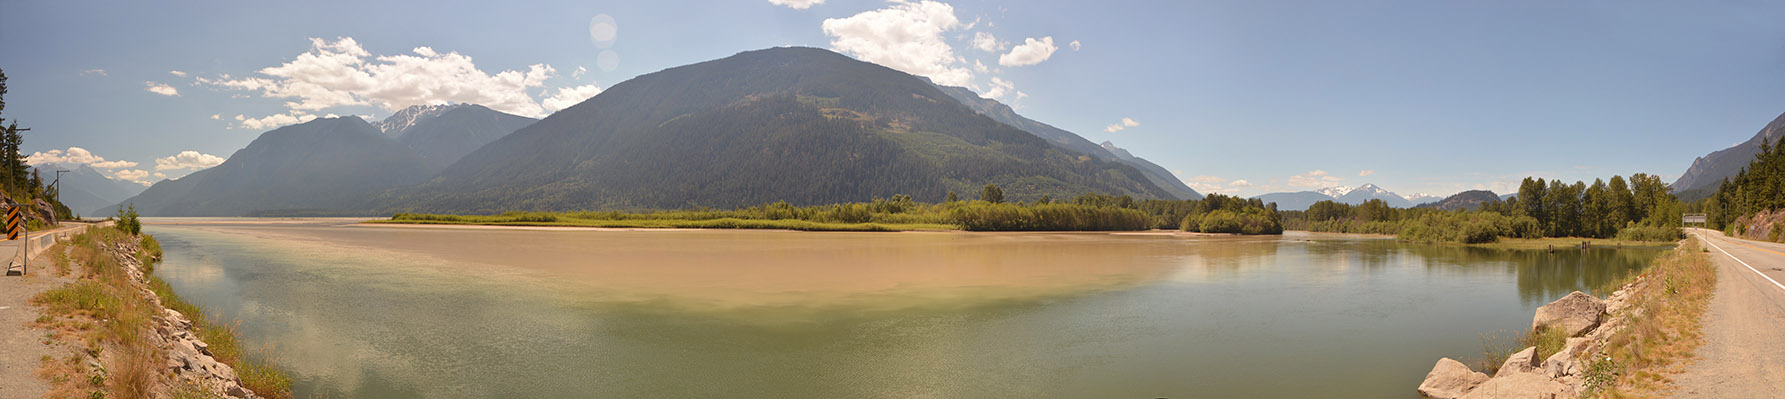
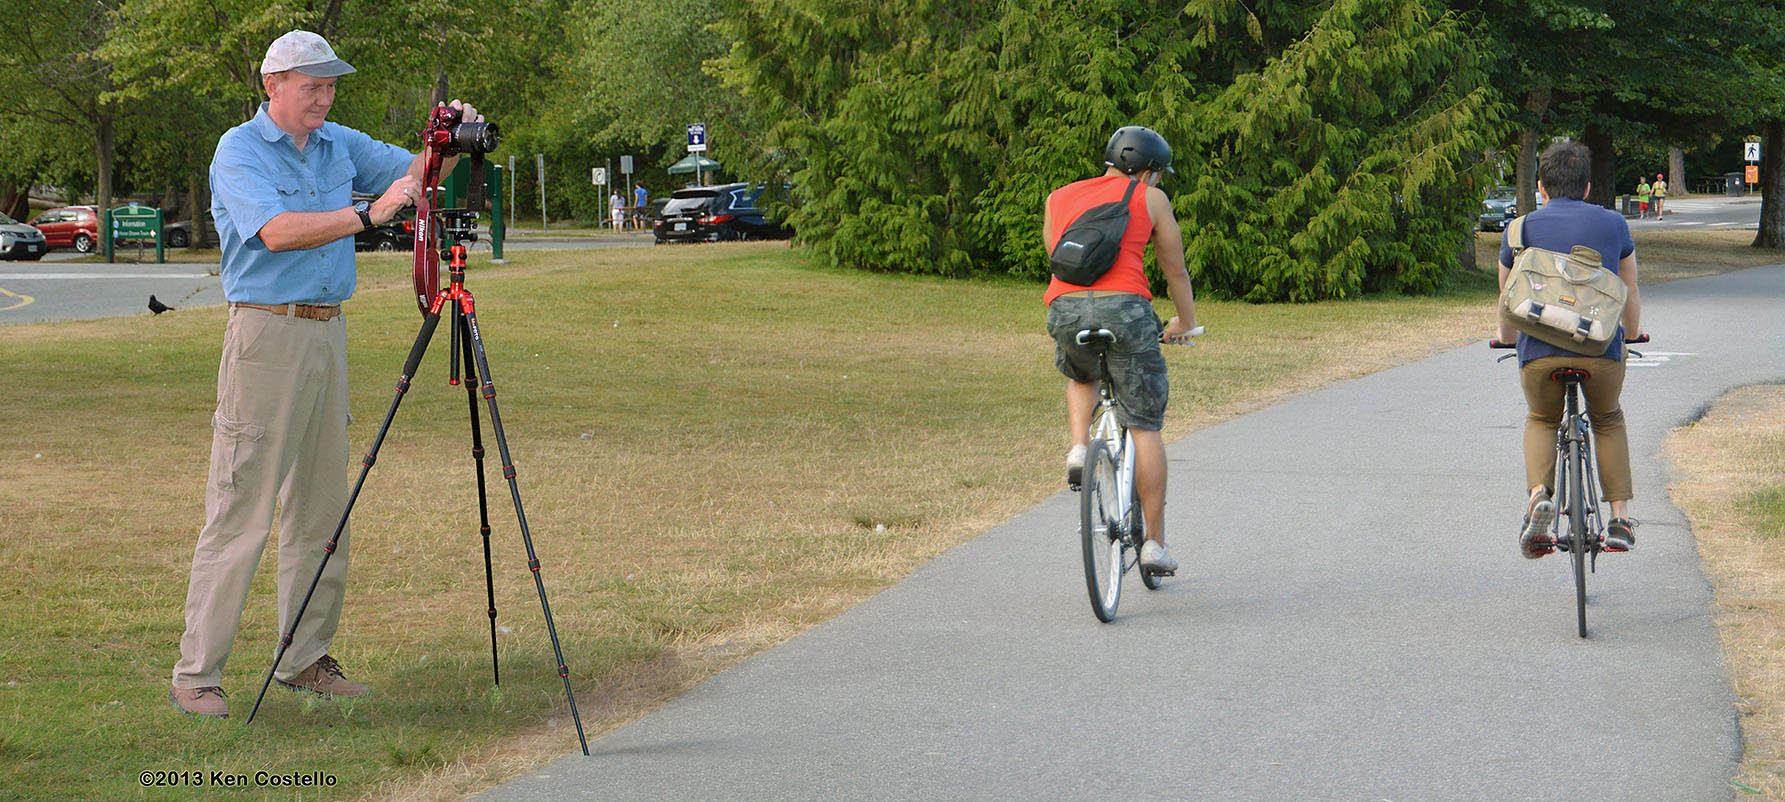
| The below panorama captures the Vancouver skyline, the Vancouver Rowing Club marina, and the bike and pedestrian pathways of Stanley Park. Bicyclists and runners stream by as pedestrians take a leisurely stroll. People in the marina are tending to their well maintained yachts. White clouds float across the sky. This panorama gives you a feeling of sitting there enjoying the nice weather and the wide open view. You also sense the enjoyment others are having as they pass in front of you. The blue and green colors are soothing and the edge of the water creates a bowl shape that serves up the marina and city of Vancouver.
Click the radio buttons to see a closeup of the panorama. |
|
|
|
|
| Clicking the radio buttons gives you close ups of pieces of the panorama, but using the following link will download a resolution of the panorama that is double the height of an HD screen and the width of 9 HD screens. That will give you a better feel for the whole panorama. This file is about 1/8 of the size I use to print the panorama. When it comes up, you can click the magnifying glass or use Ctrl + or Ctrl - keys to enlarge and shrink (use Cmd key on Mac).
HarbourSunPanorama18000x2000.jpg |
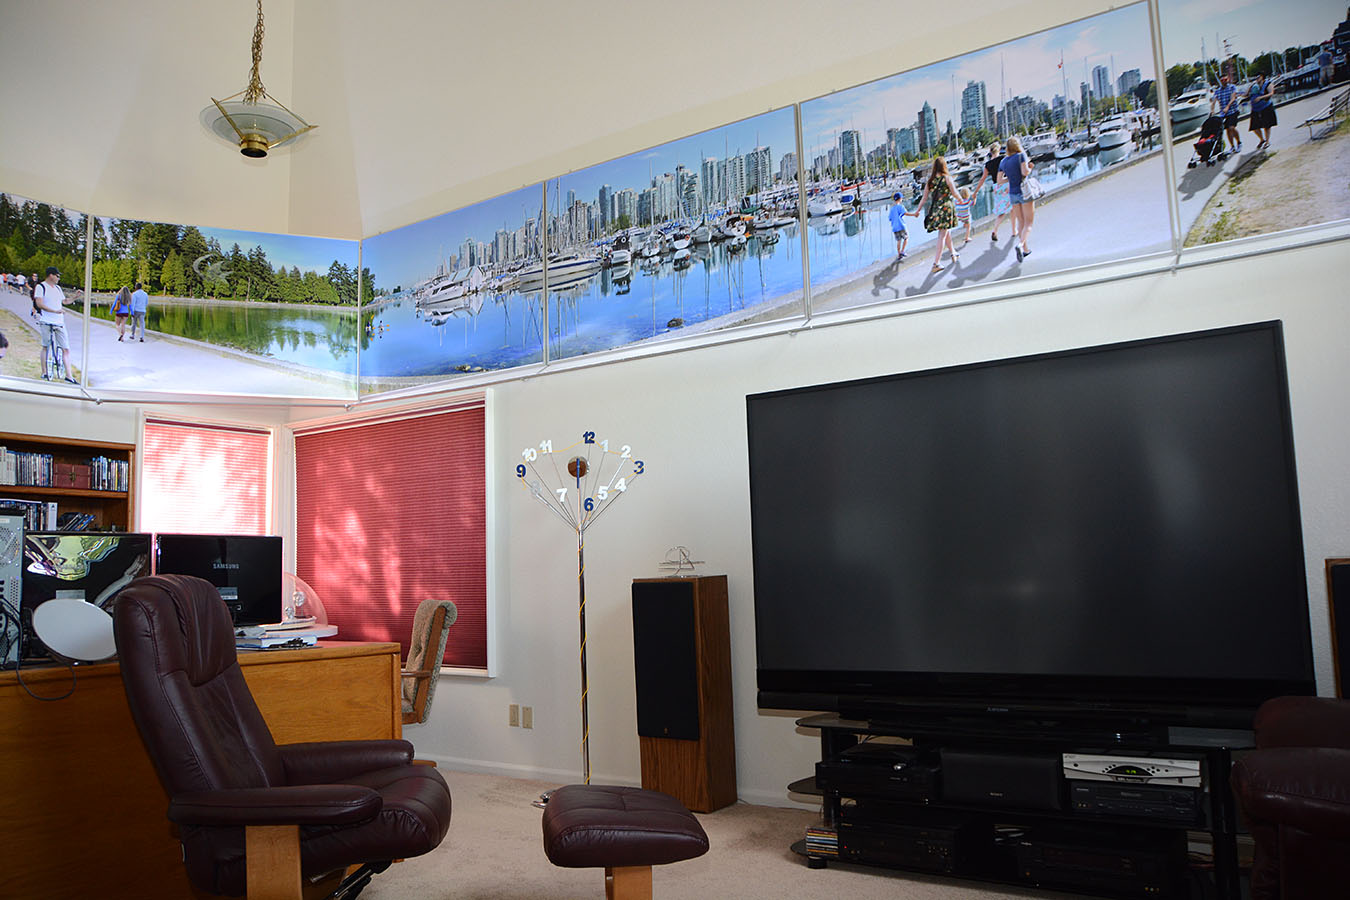
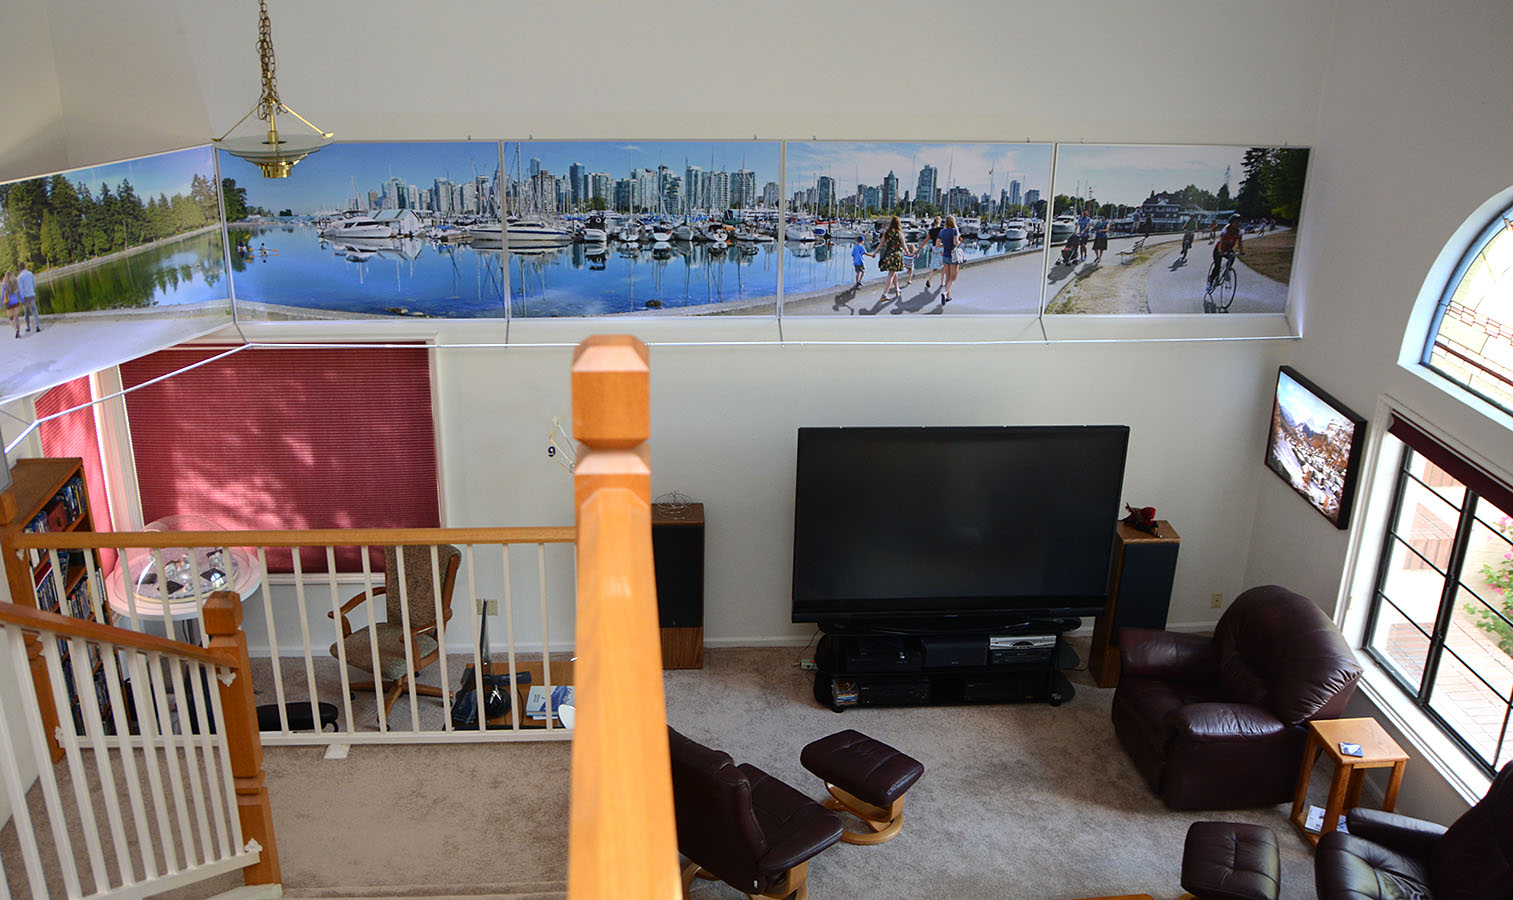
| Technical details: The marina panorama was shot over a two day period in the late afternoon at the south end of Stanley Park (a peninsula on the northwest end of Vancouver. The camera captured about 3/4 of a circular view of the area. The right side is facing northwest and the left side is northeast. The middle is basically facing south. Stanley Park has two pathways, one for pedestrians and one for bicyclists. As I panned the camera through the 3/4 of a circle, I stopped at every 15 degrees to take at least 3 photos. One made sure the foreground was focused (walkways and nearby people). One had the focus on the midground (front row of boats), and the third had the lens focused on the background (Vancouver skyline). These 3 images were spliced together to create one image where all objects are in focus. This matches how our eyes see the world because the eyes are constantly refocusing to make whatever we look at be in focus. It took 19 sets of 3 images (focused differently) to cover 3/4 of a circle. So 57 high resolution images (19x3) were stitched together to make the basic panorama. However, some shots in the same direction had people in them and some did not. So I had a choice of meticulously cutting people out from where they were originally standing and moving them to another place to better spread them out or to better compose the whole image. So at least a hundred Photoshop hours were used just for that. Remember this was shot over 2 days with about 4 hours each day. So there were a lot of people coming through the scene. By taking hundreds of photos, I could pick and choose who was to be in the final image. The final panoramic image is over 50,000 pixels wide and about 6,000 pixels tall. The Photoshop file is over a gigabyte. This allows the panoramic print to be 30 feet wide and still have a lot of detail. I have a 30 foot print of it in my living room. It wraps around two walls. |
| Below are two images of the above panorama hanging in my living room. It is 30 feet long and 40" tall. It wraps around 2 walls (one is 23 feet and the other is 10 feet). Being so large, I wasn't able to get a photo of all of it in any one photo. I guess I need to make a panorama just to show the panorama. |
|
|
"Above Vancouver at Sunset" by Ken Costello
|
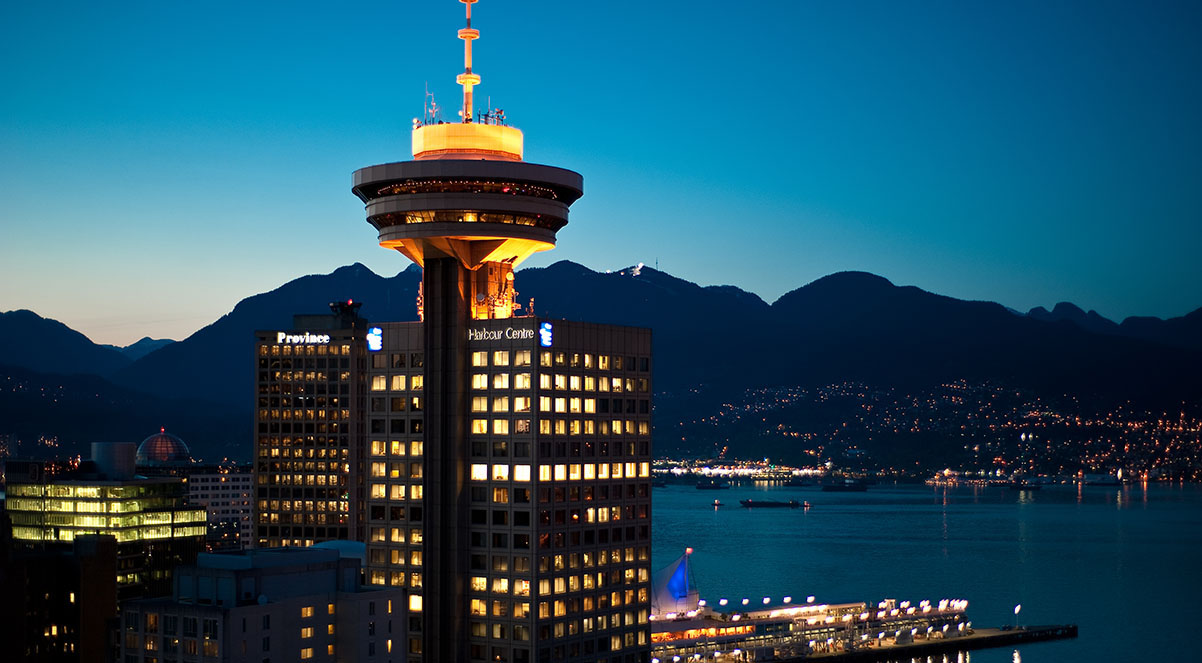
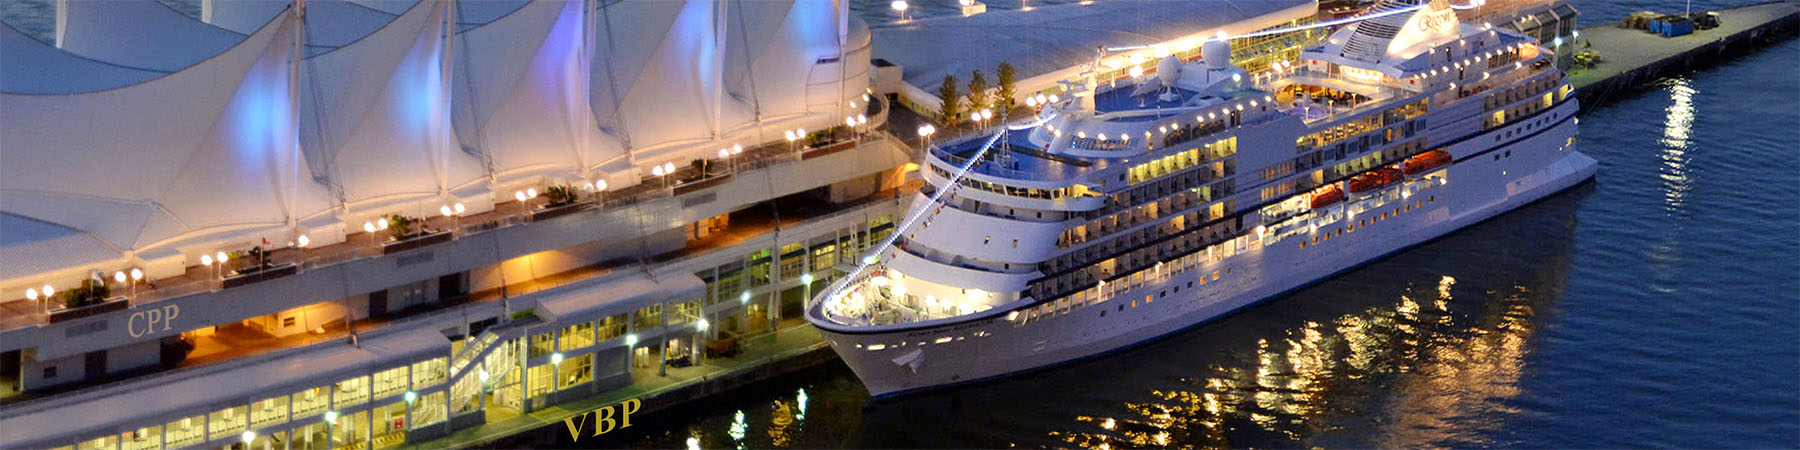
The photos taken for my panorama were shot from the Lookout Tower at the top of the Harbour Centre Highrise (see photo on the right). The top floor is the revolving restaurant. The floor underneath that is the place where visitors can look out in all directions. That's where I took the photos for the panorama. I circled the tower and took photos out of 22 of the windows. At each window, one photo was shot straight outward. The second one was aimed down about 30 degrees, and the third shot was aimed downward towards the buildings and street below. Because sunset only lasts about 30 minutes, I had to visit the tower for two nights in order to get photos of the complete circle. With 3 photos at 22 windows, there were 66 photos needed to create the 360 degree panorama. Note: The photo on the right is from the Lookout Tower's website. (It's not a photo I took.) |
 |
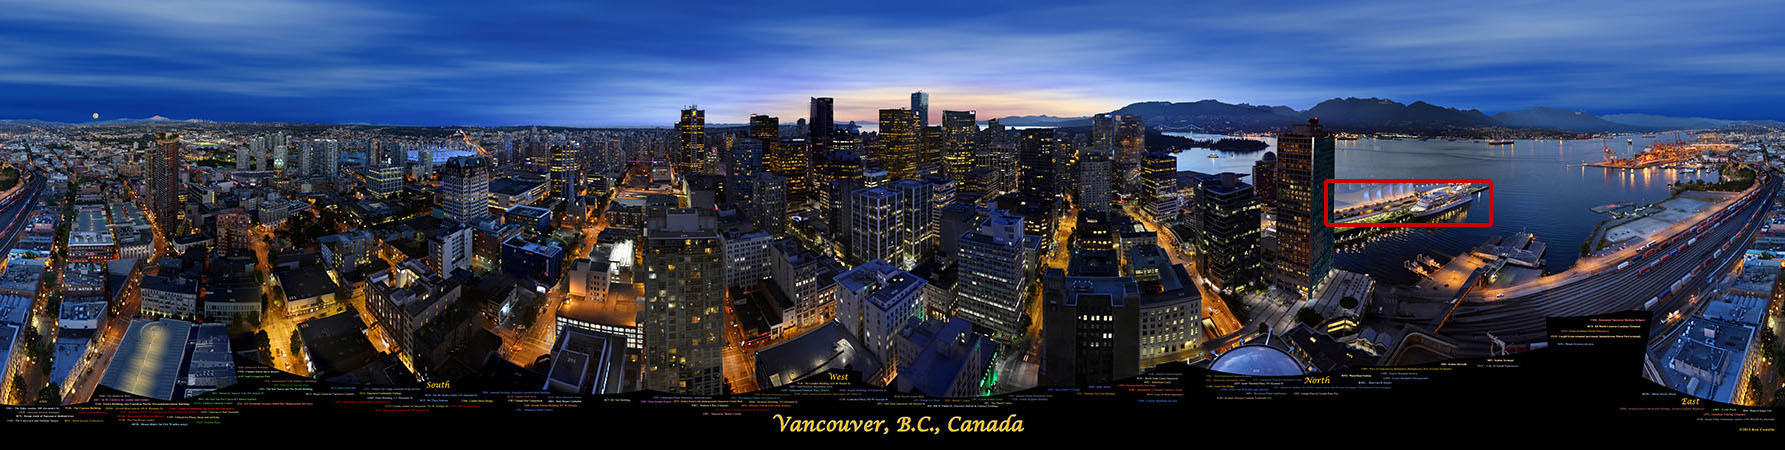
Below is the panorama used as an example on the home page. This time I have comments for each close-up plus a few more close-ups. Even though the panorama is beautiful I also wanted to make it informative. So I have placed 3 character codes on buildings and points of interest. I kept the 3 character code in perspective so that it appears to belong on the building as if it were a sign. At the bottom of the image the full name is listed for each 3 character code.
Most panoramas of cities only look out over a city. In this panorama, I made the effort to look down at the streets and building tops below. This makes this view a close match to what people see when looking out the windows at the Lookout Tower. I have a 12 foot x 3 foot back lit print of this in my house. It really makes me feel that I'm back in Vancouver at the Lookout Tower looking over the city. Sunset is such a beautiful time to see the lights of the buildings yet not be too dark to see other features of the city. Click the radio buttons below to enjoy the closeups and comments. |
|
|
|
|
| Clicking the radio buttons gives you close ups of pieces of the panorama, but using the following link will download a resolution of the panorama that is the height of 2 HD screens and the width of 4 HD screens. That will give you a better sense of the panorama. The image that I use to print this panorama is about 14 times larger than this image.
Click magnifying class to enlarge. Use Ctrl + or Ctrl - to enlarge or shrink image. (use Cmd key with Mac)
Above Vancouver at Sunset |
| Technical details: 66 of the best photos were used to stitch together the panorama; however, there were a lot of stitching errors because I had to move the camera around the Lookout Tower to see the whole city. The stitching software normally requires that the tripod does not move. By moving, the alignment of buildings in front of each other will shift. This leads to a disjointed image. So I had to use another 60 or so images to fix the stitching errors which mostly appeared as floors of buildings not lining up with each other. This added a month of Photoshop work to the creation of the panorama. The stitching software also wants the camera never to change its zoom; however, I did take some zoomed in shots and was able to incorporate them into parts of the panorama to increase detail using Photoshop.
To identify the buildings and points of interest, I spent a lot of time examining Google aerial images along with doing virtual driving through the city with Google Streetview. I then matched up what I saw there with what I see in my panorama. It was meticulous work but enjoyable; almost like taking a virtual vacation. I'm from Phoenix, Arizona so Vancouver represents a nice change of scenery for me. |
"Whistler's Village Square" by Ken Costello
|
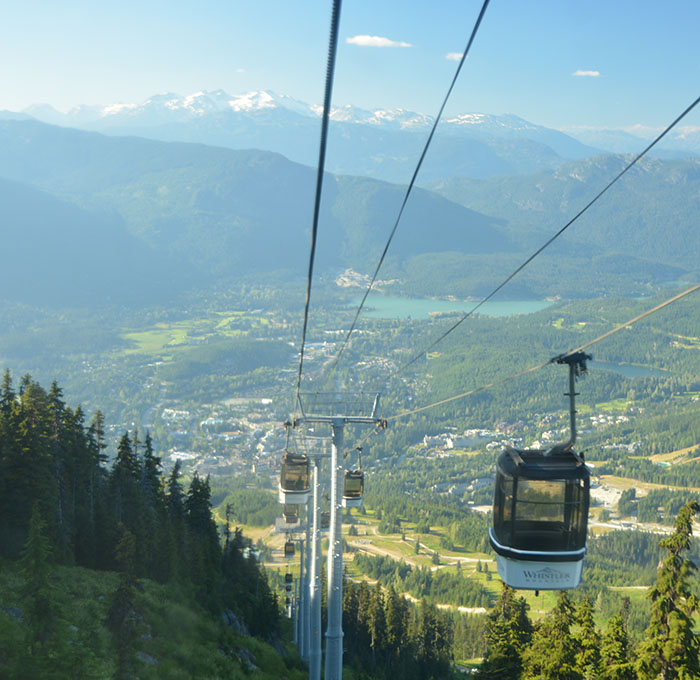
| Whistler is a ski resort town about 80 miles north of Vancouver. Many of the 2010 Winter Olympics competitions were based at Whistler. It has several ski lifts that serve two adjacent mountains. In the center of the town of Whistler is Whistler Village, which is world renown for its shopping, restaurants, hotels, and night life. It's also unique because much of it is off-limits to automobiles making it a perfect place for pedestrian walkways and for public squares (plazas).
I took panoramic photos of Village Square, Mountain Square, Olympic Plaza, and Village Park. Below is the 360 degree panorama of Village Square. It took a couple of hours to photograph and a couple hundred hours at the computer to stitch and modify the images into the final panorama.
The photos were taken directly from the center of the square. So this gives you an equal view in all directions. If you are a people watcher, then you will enjoy this panorama. There are around 200 people enjoying the outdoor cafes, taking strolls, or shopping.
The most flattering lighting for people is soft lighting which doesn't produce dark shadows or hot spots on the faces. This day had a thin layer of clouds which produces the soft lighting photographers wish for. Without the sun's glare, people's faces are more relaxed and their mood is better.
As you view the panorama, you may sense that many are happy to be at such a popular location. Also, from so many people eating outside, you can tell it's not cold or hot, but perfect.
|
 |
| This is a very wide panorama. It is 14 times wider than it is tall. One reason is that it is 360 degrees and there was some cropping at the top and bottom. Vancouver Sunset was 360 degrees, but it was shot 3 layers (photos) tall. Village Square was shot with the camera shooting sideways to get more height and then moved in a circle in 15 degree increments. The final image is over 60,000 pixels wide and about 4500 pixels tall. So it can easily be printed at over 30 feet wide if desired. |
|
Since the panorama is so wide, it had to be shrunk tremendously to fit on the computer screen. Instead of using radio buttons so that you can zoom in on certain parts, I have broken up the image into left and right halves. |
 |
 |
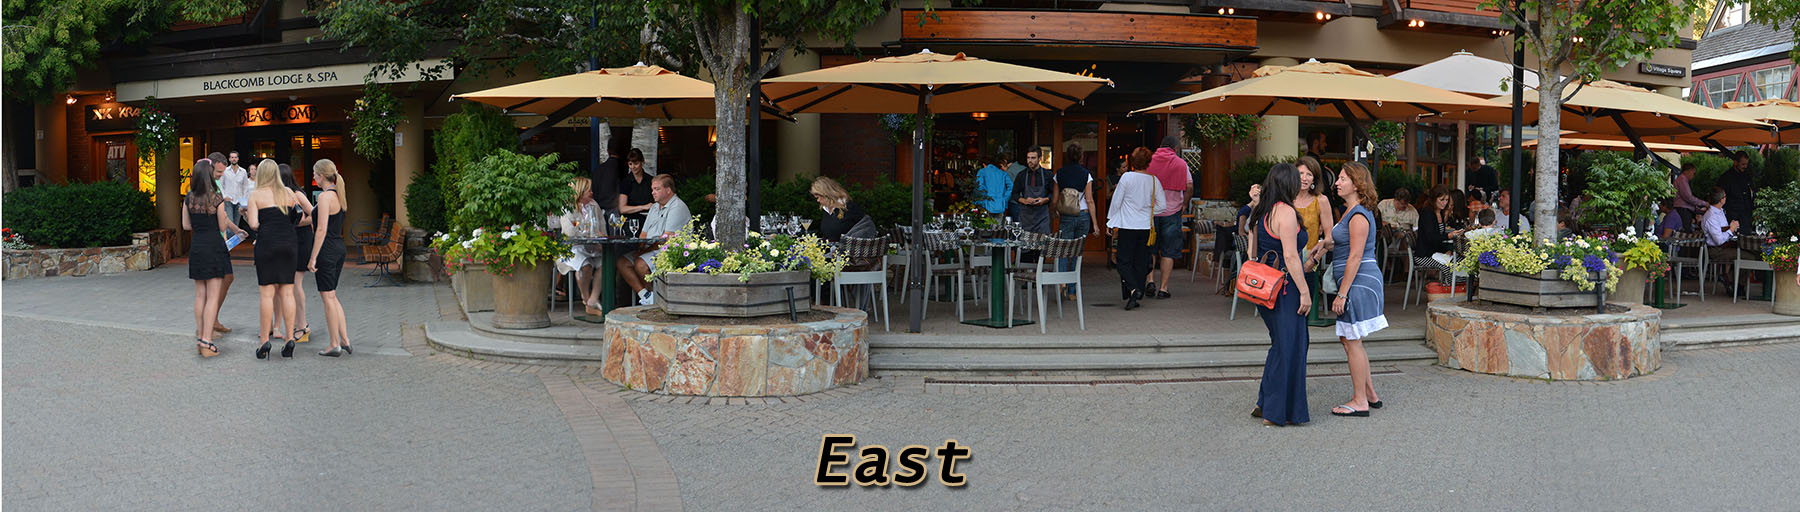
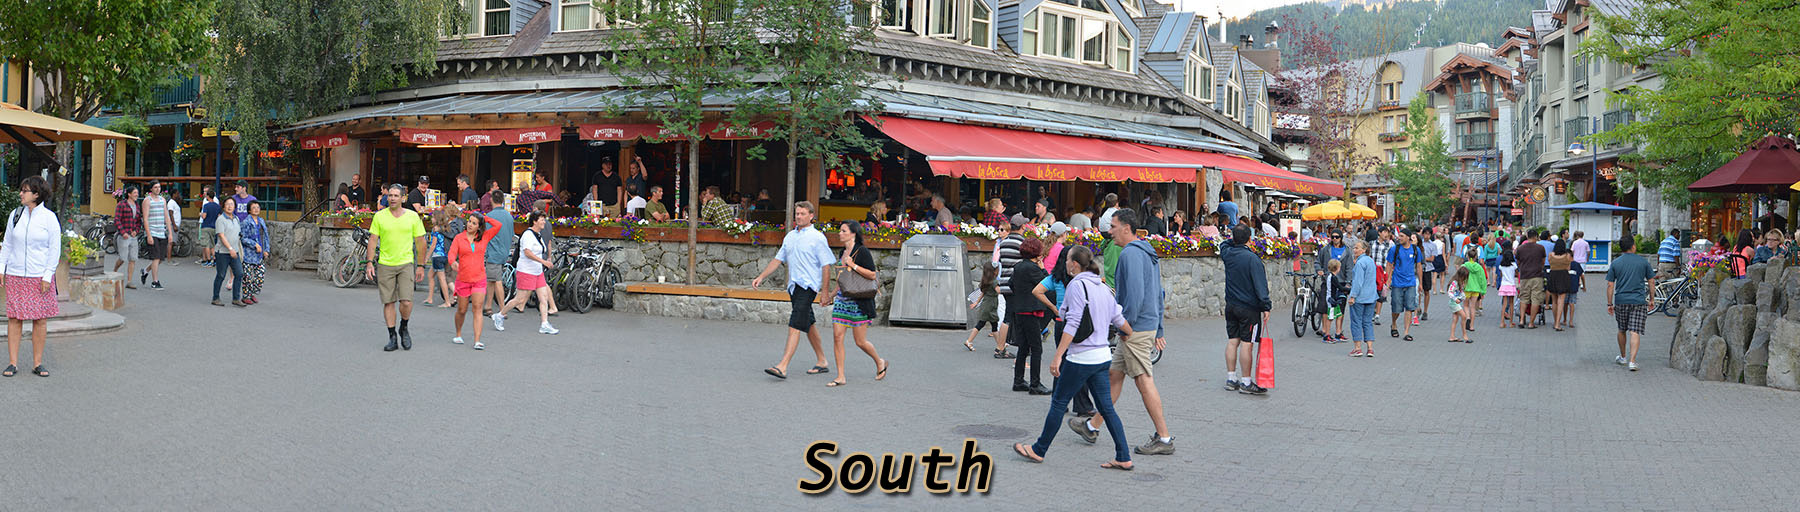
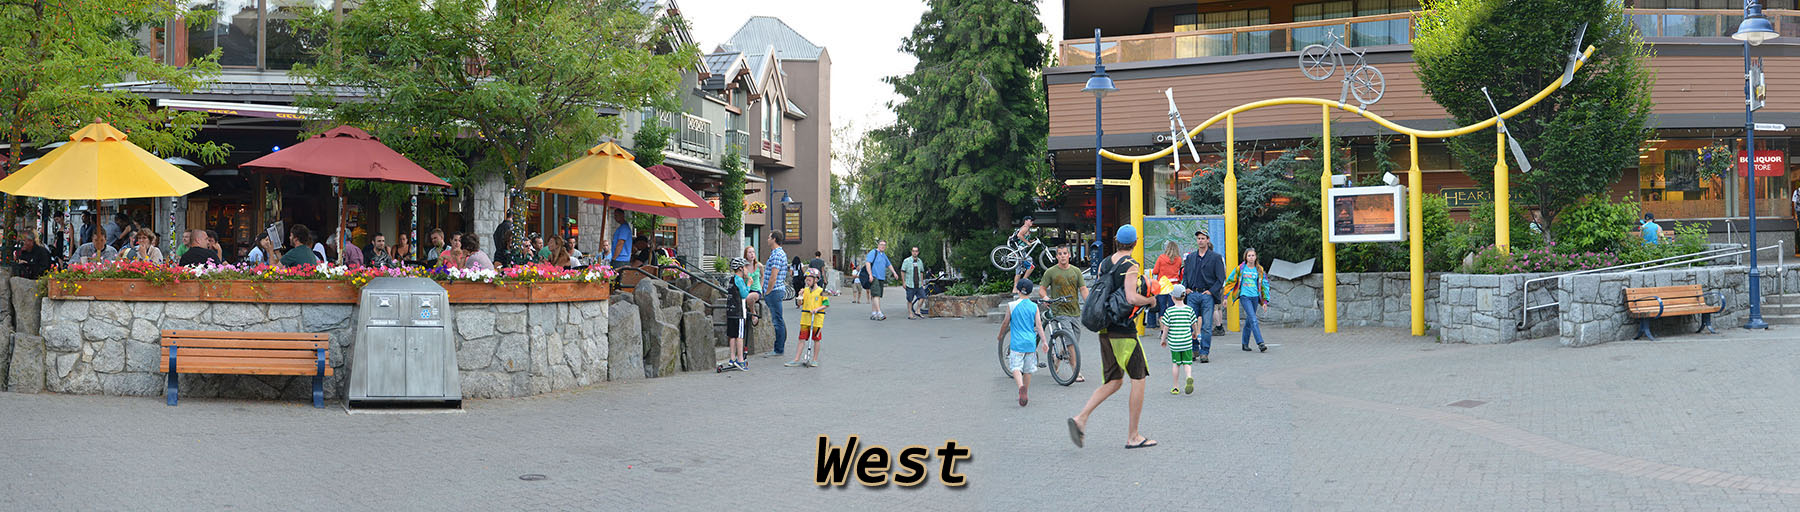
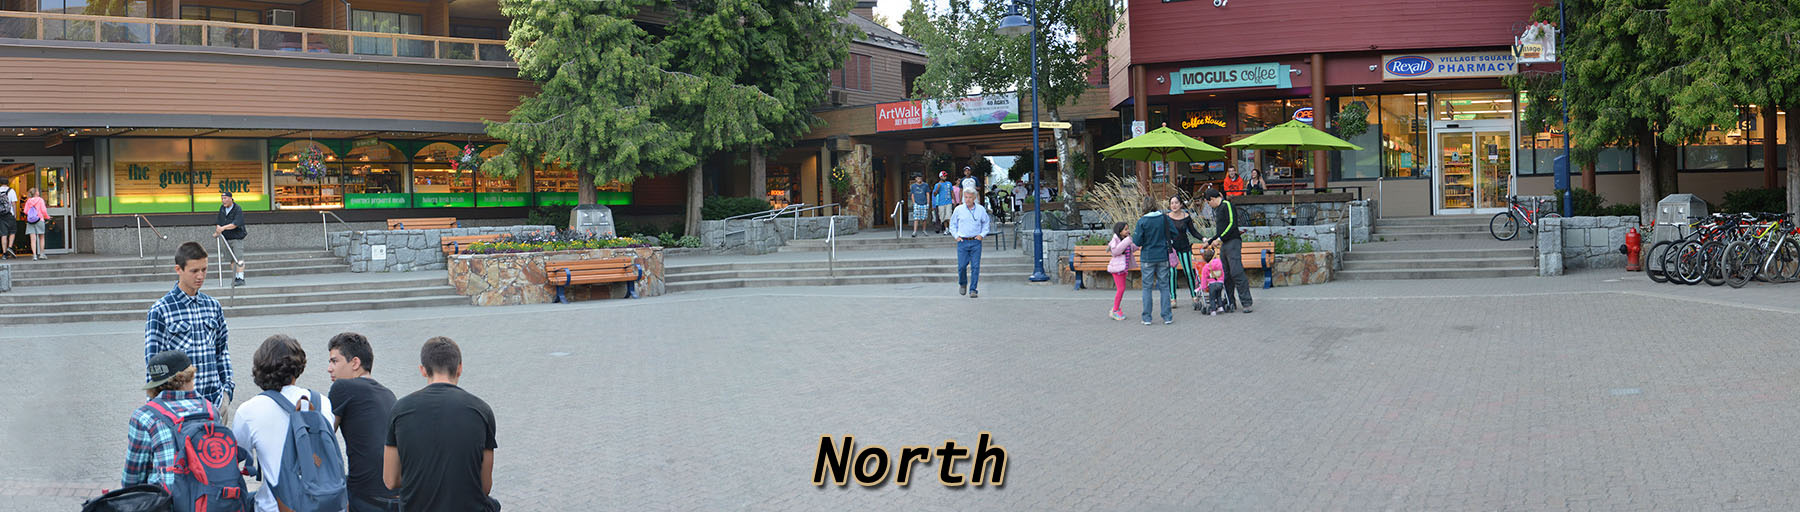
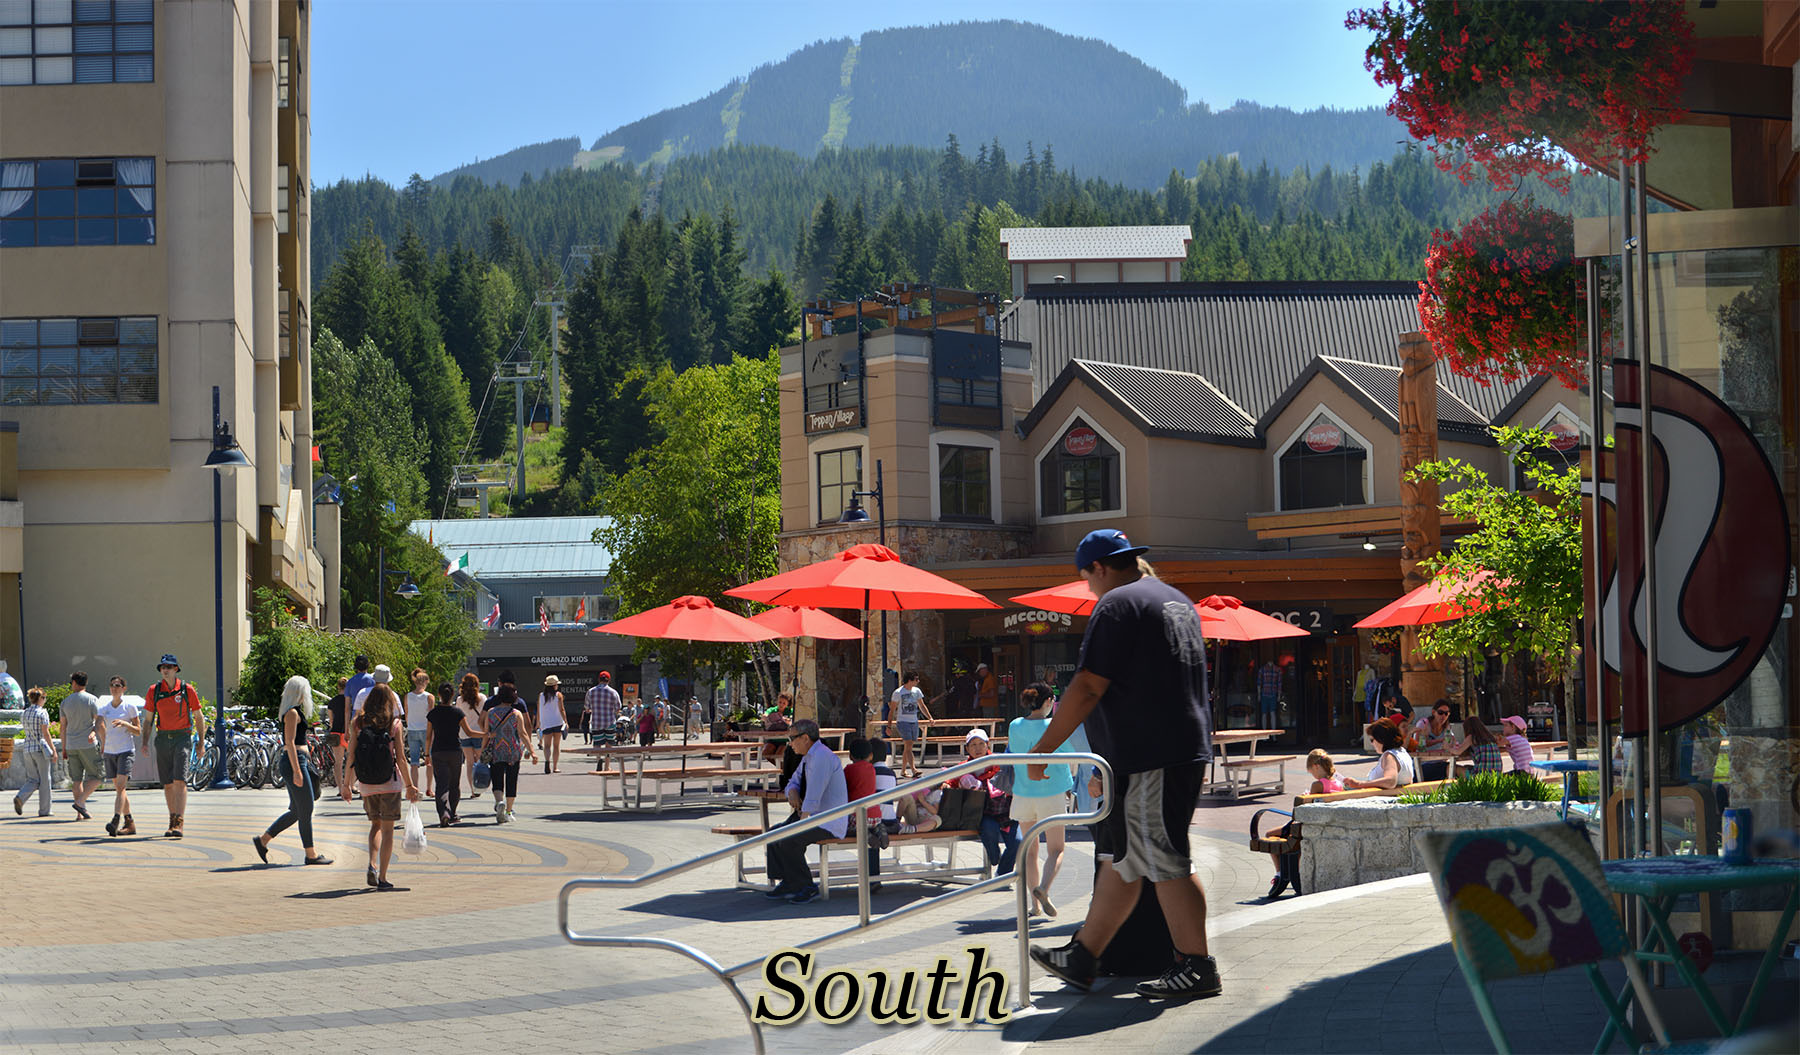
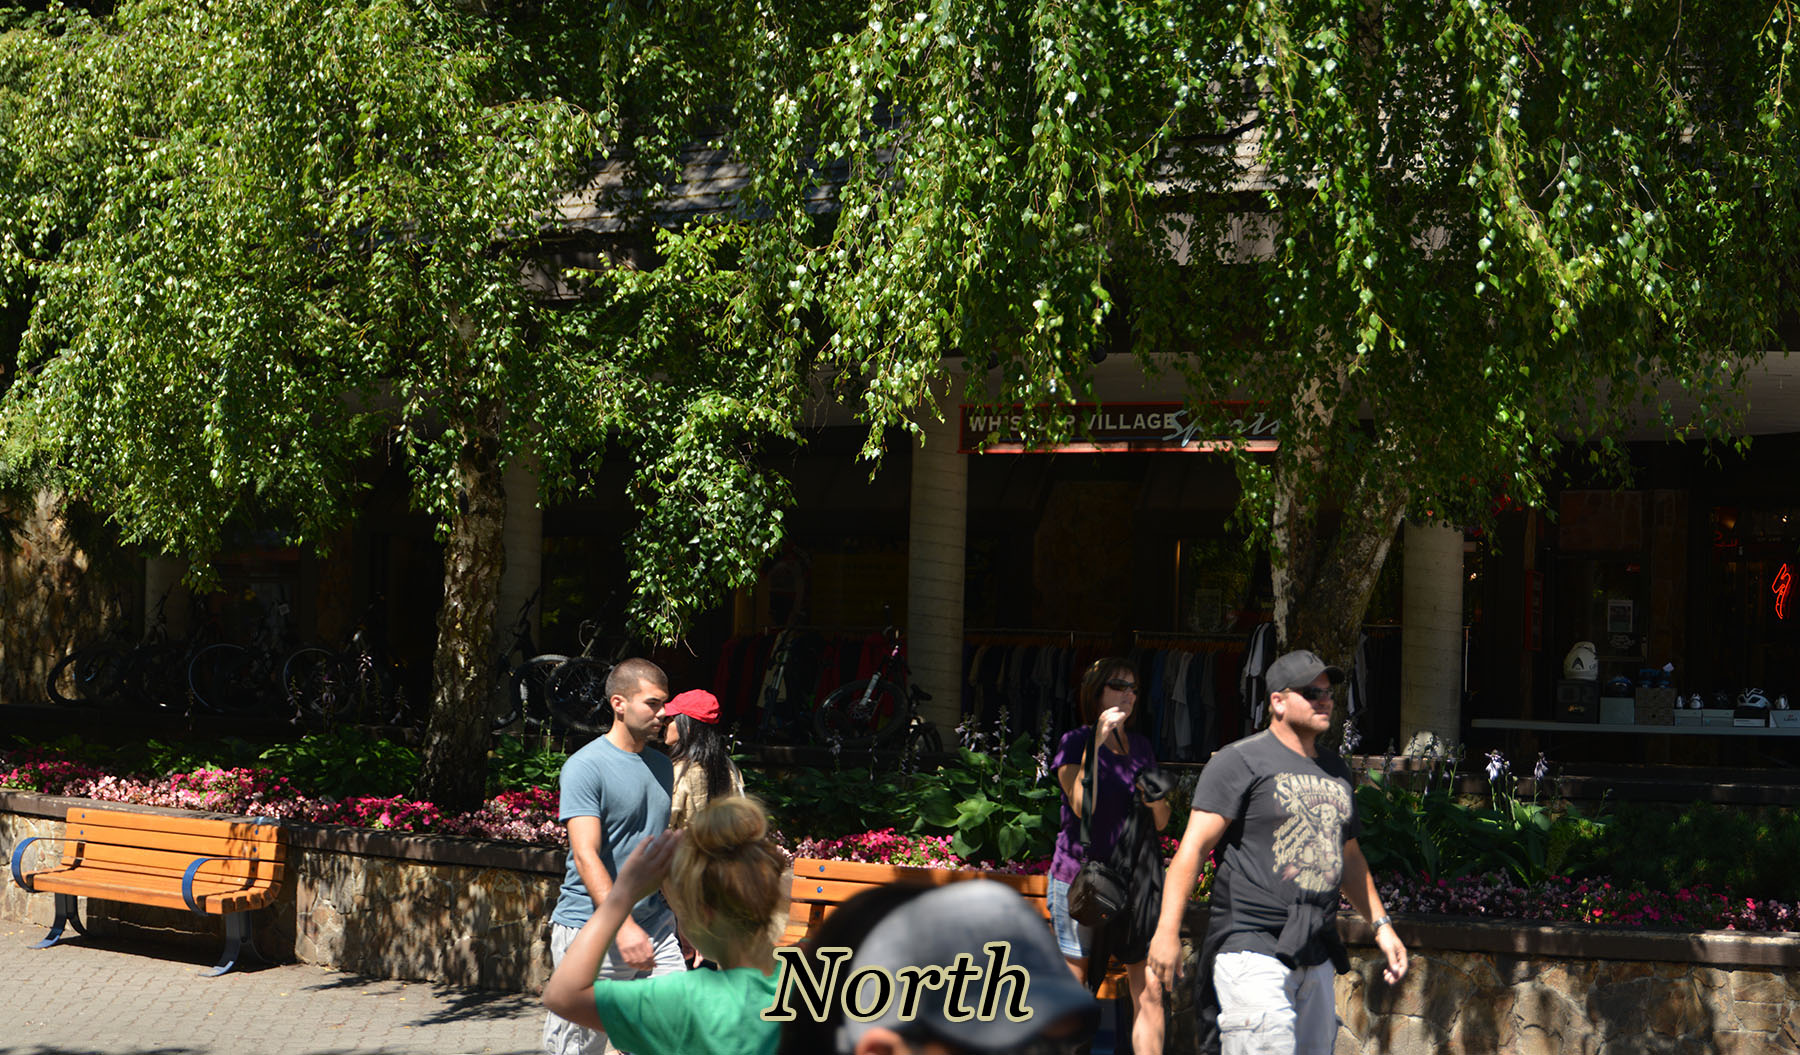
| The above two images show you the left and right side of the panorama. To see more details, the below 4 images break up the panorama into east, south, west, and north. |
 |
 |
 |
 |
|
|
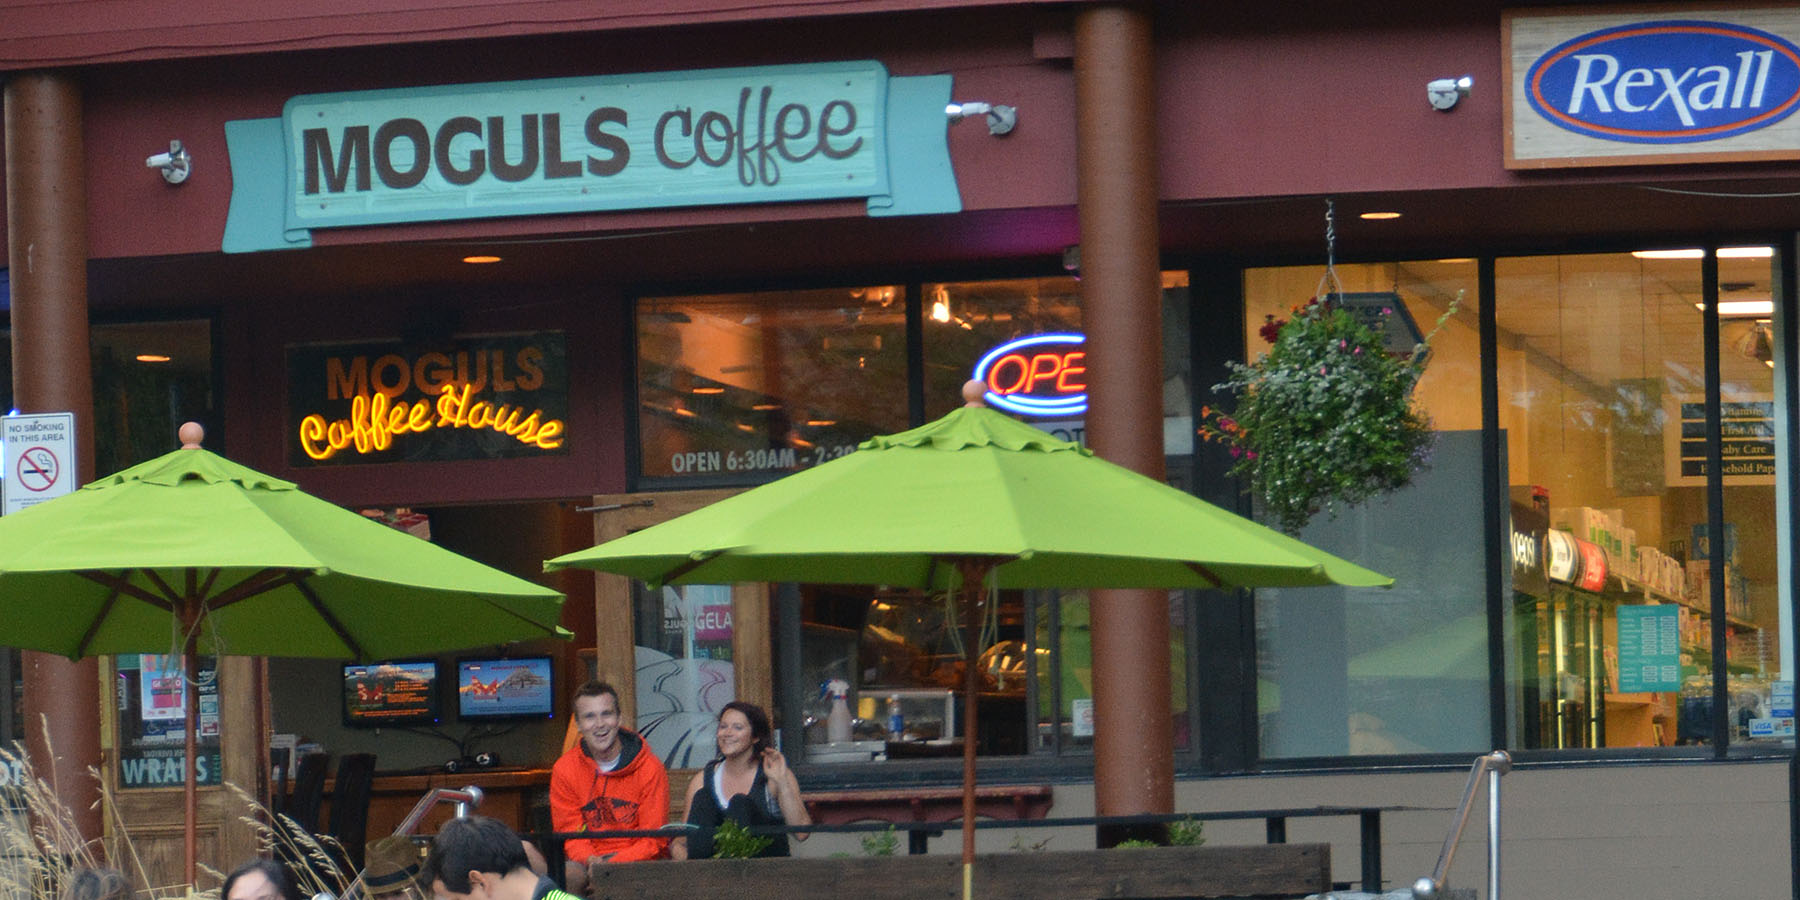
| To show the full detail that the panoramic image has, the below image is a close up of the Moguls coffee house shown in the above image. Notice you can read the no smoking sign on the far left and even signs inside of the Rexall store. |
|
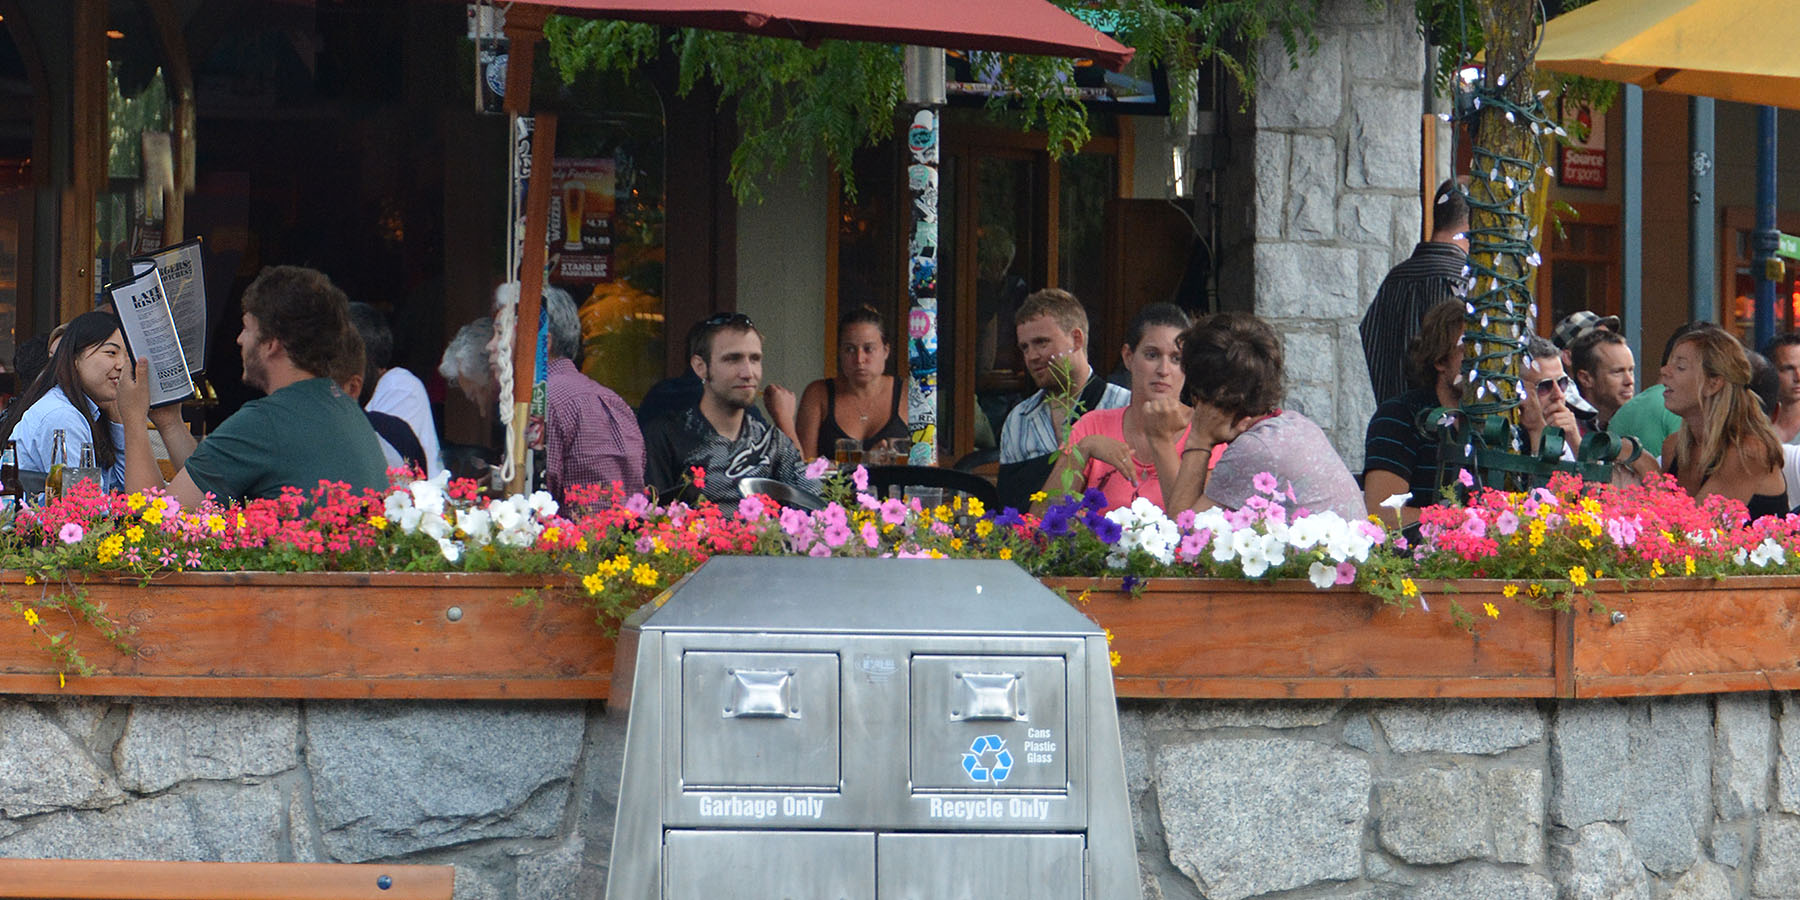
| This is a closeup view of the cafe shown in the West side of the panorama. |
 |
Technical details: The panoramic head on the tripod holds the camera in such as way that when the camera is panned sideways or up and down, there is no parallax, which is an apparent shift of a forground object with a an object behind it. To see parallax, close one eye and hold your finger out in from of you and look at the finger. Now turn your head left and right. You will notice that the objects behind your finger appear to shift. The objects didn't move, but they appear to. Now look at your finger again, and move your gaze left and right, but pay attention to your finger and what is behind it. Notice that when just your eye moves, the objects behind the finger do not move. So that eliminates the parallax. The panoramic head does the same thing to the camera. It allows it to turn without parallax. Parallax causes problems with the stitching of photos because in one photo the background objects are in one position behind the foreground but in other photos the background shifts.
This panorama required the stitching of 24 photos to create the 360 degrees by moving the camera 15 degrees at a time. At each position, I would take a photo focused on the foreground, one focused on the mid-ground objects and one focused on the background. The parts of these 3 photos that are in focus need to be combined in something like Photoshop to make just one photo. Unfortunately, as you are taking photos as people are moving, so many extra photos are needed. Also, some people are at the edge of a photo (cut in half) and do not appear in the adjacent photo. So they have to be erased from the photo. Several 360 rotations of the scene need to be taken in order to get shots with people and shots where the background shows without people in front of it. This allows the meticulous cutting of people from one photo and shifted into another location so as to not have people on top of each other. The final photo looks like a moment in time like regular photos, but due to the need to take multiple shots over an hour or so, a lot of modification is needed. One advantage of this digital manipulation is that you can keep most all objects in focus which is more like what your brain expects when you are there for real. |
"Village Stroll into Whistler Olympic Plaza" by Ken Costello
|
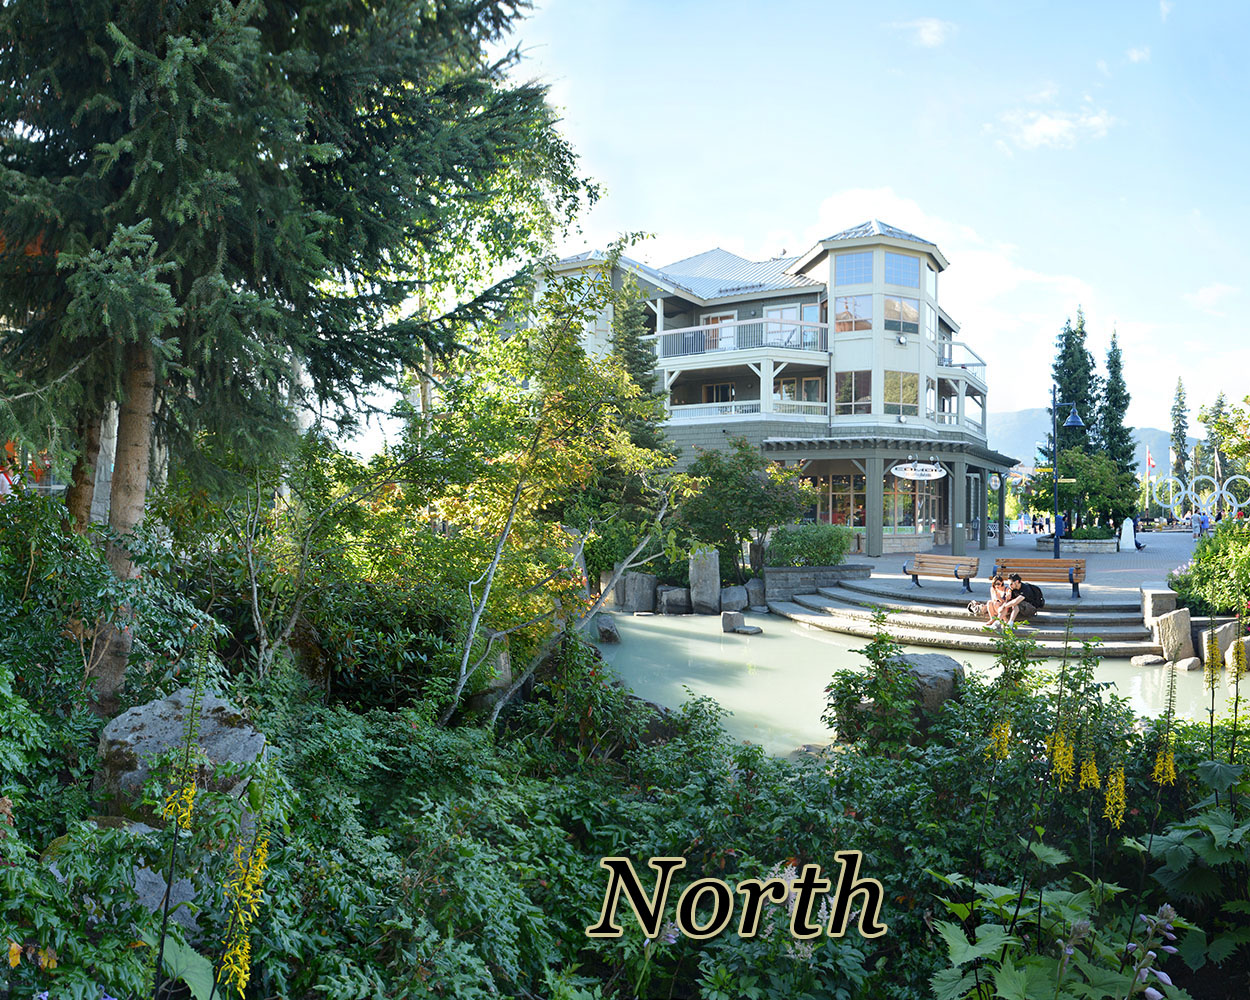
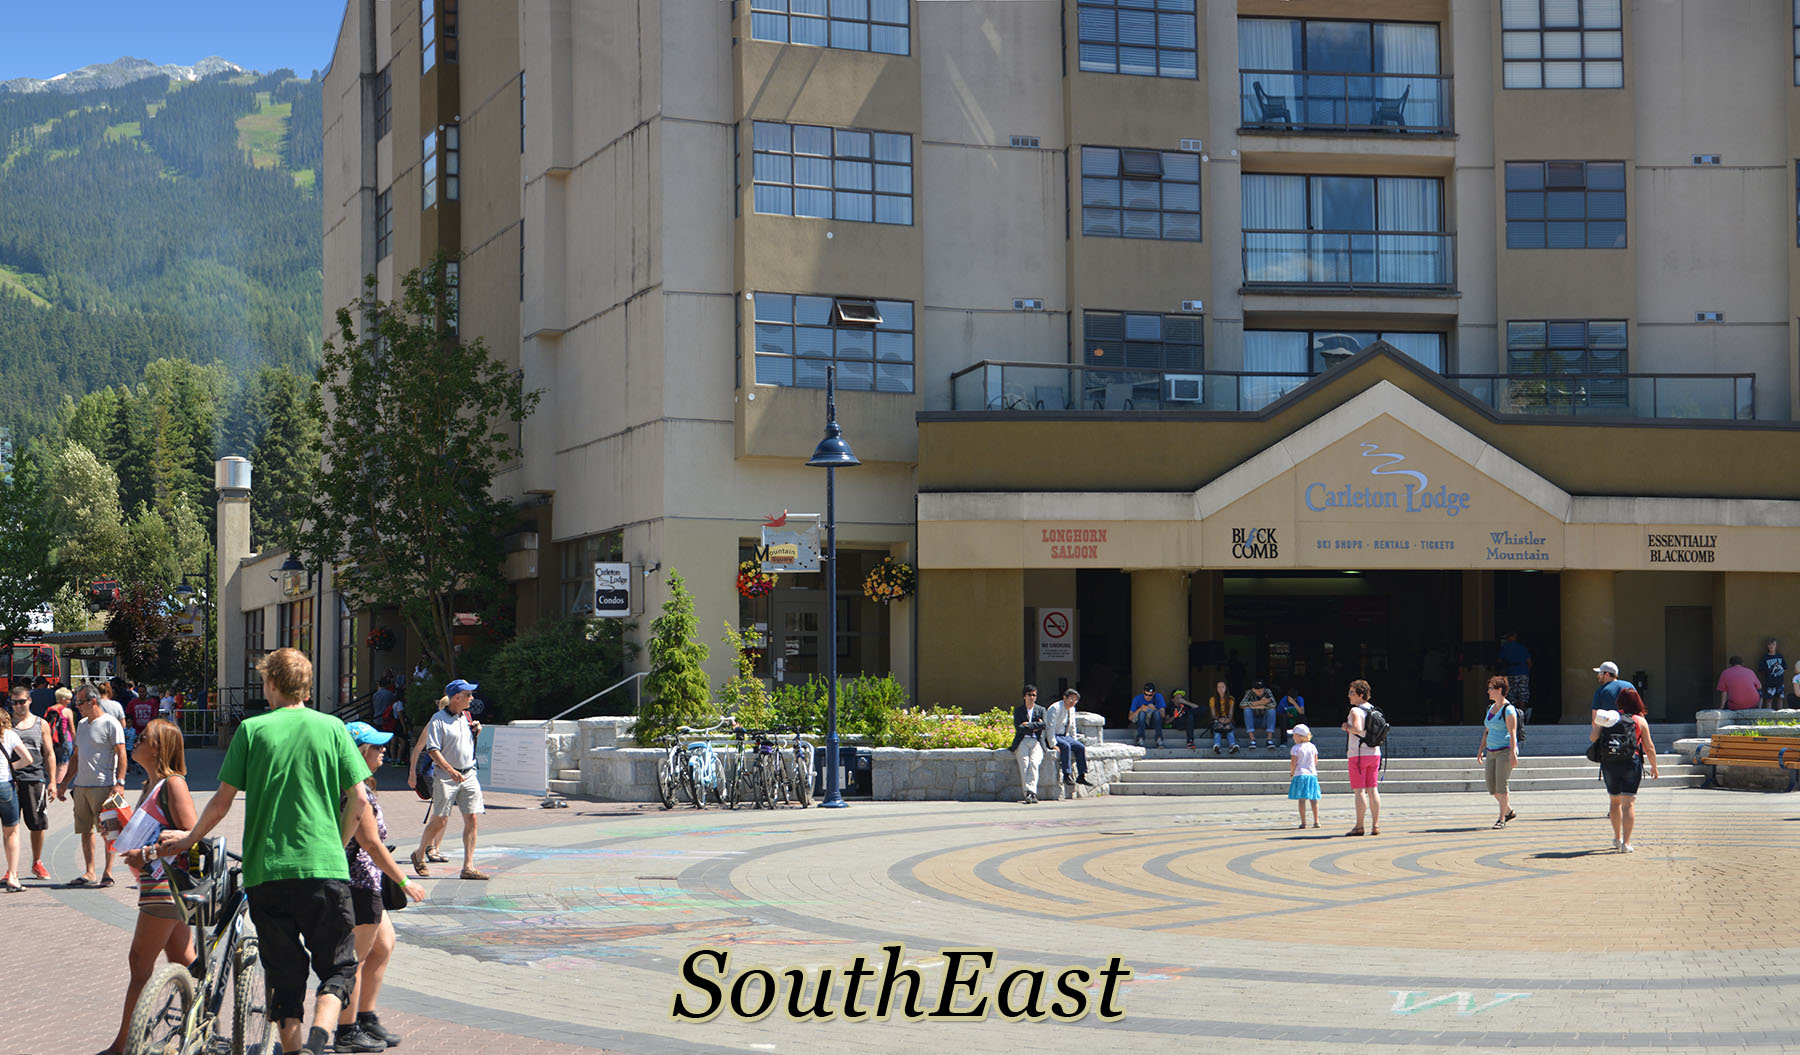
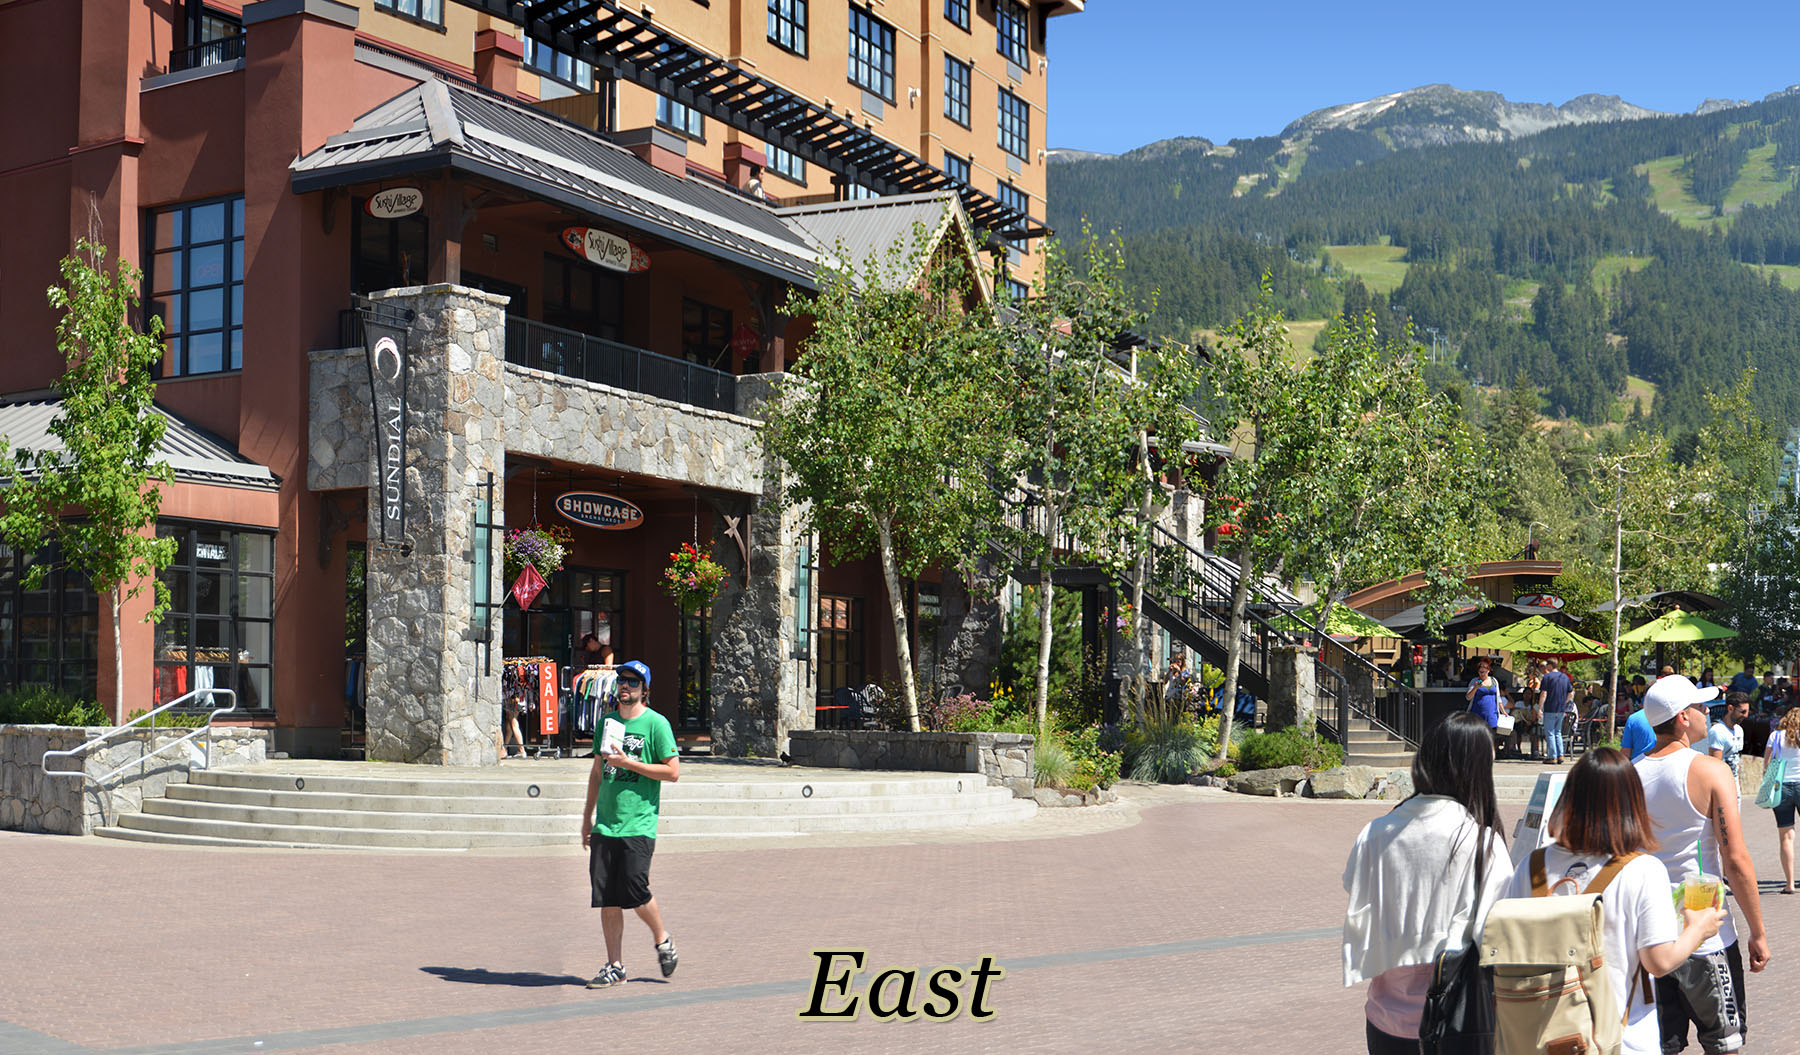
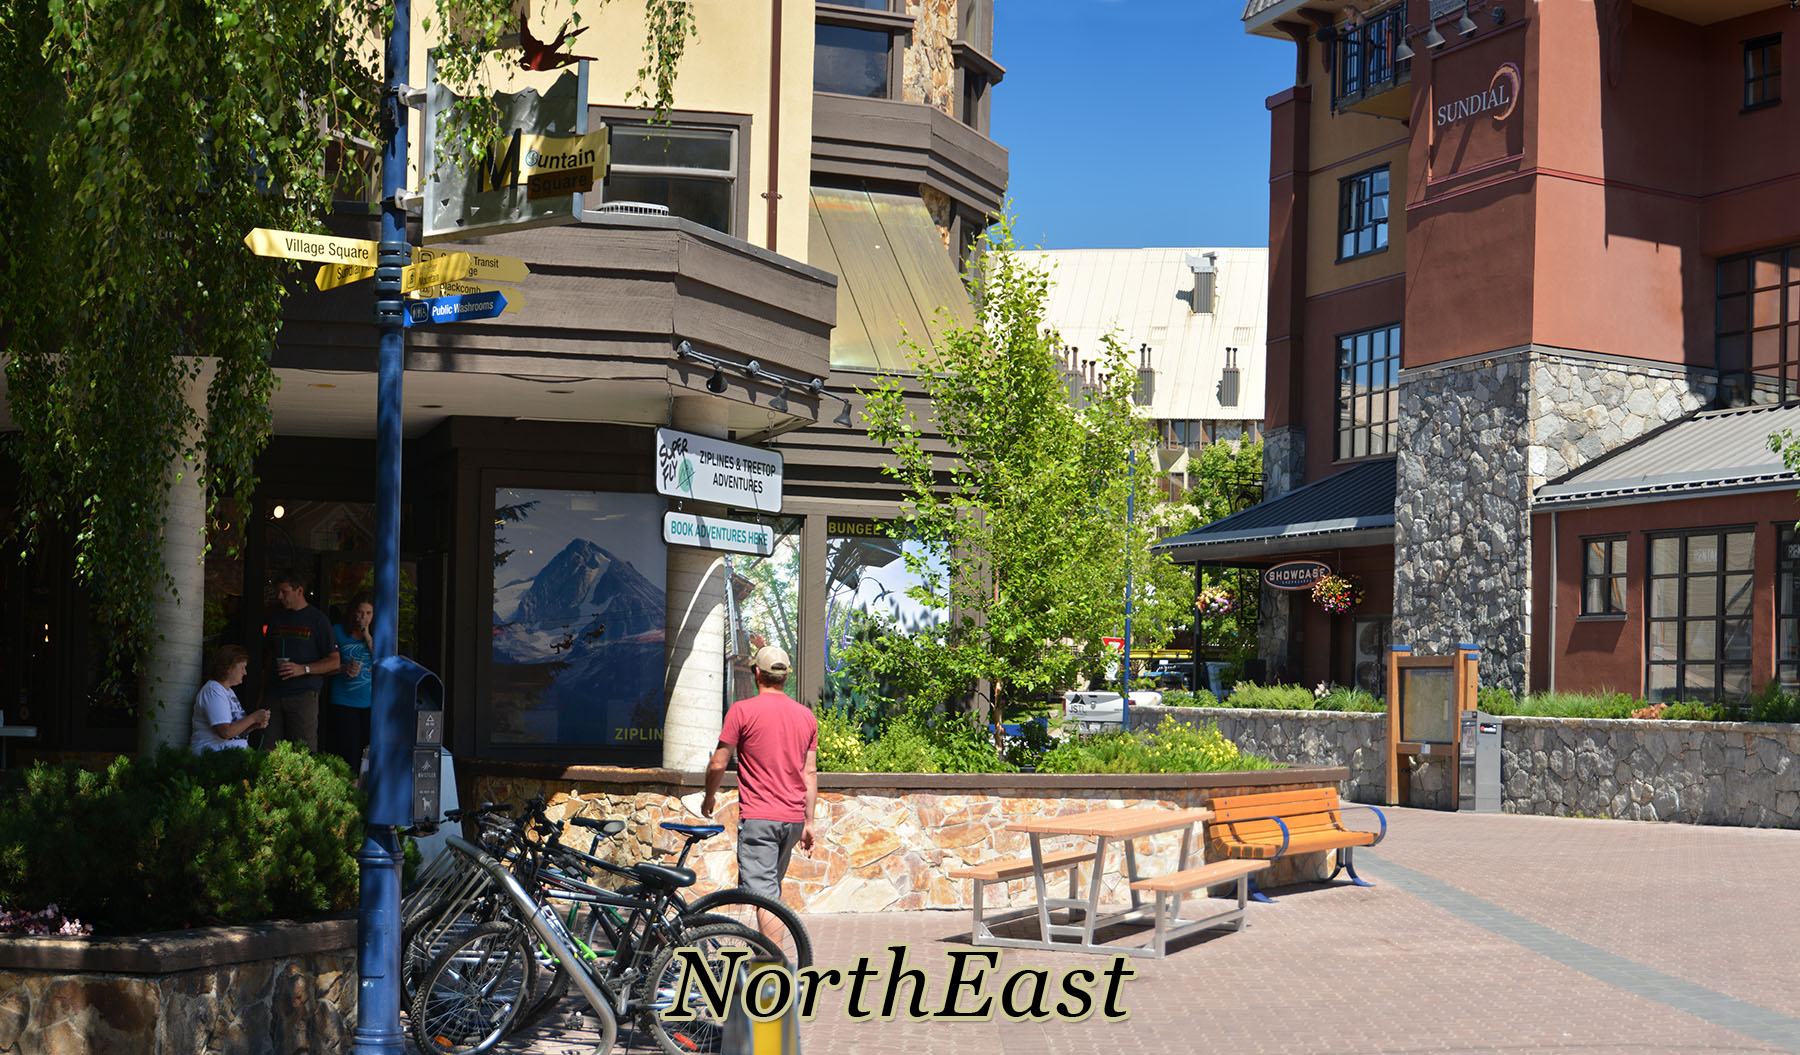
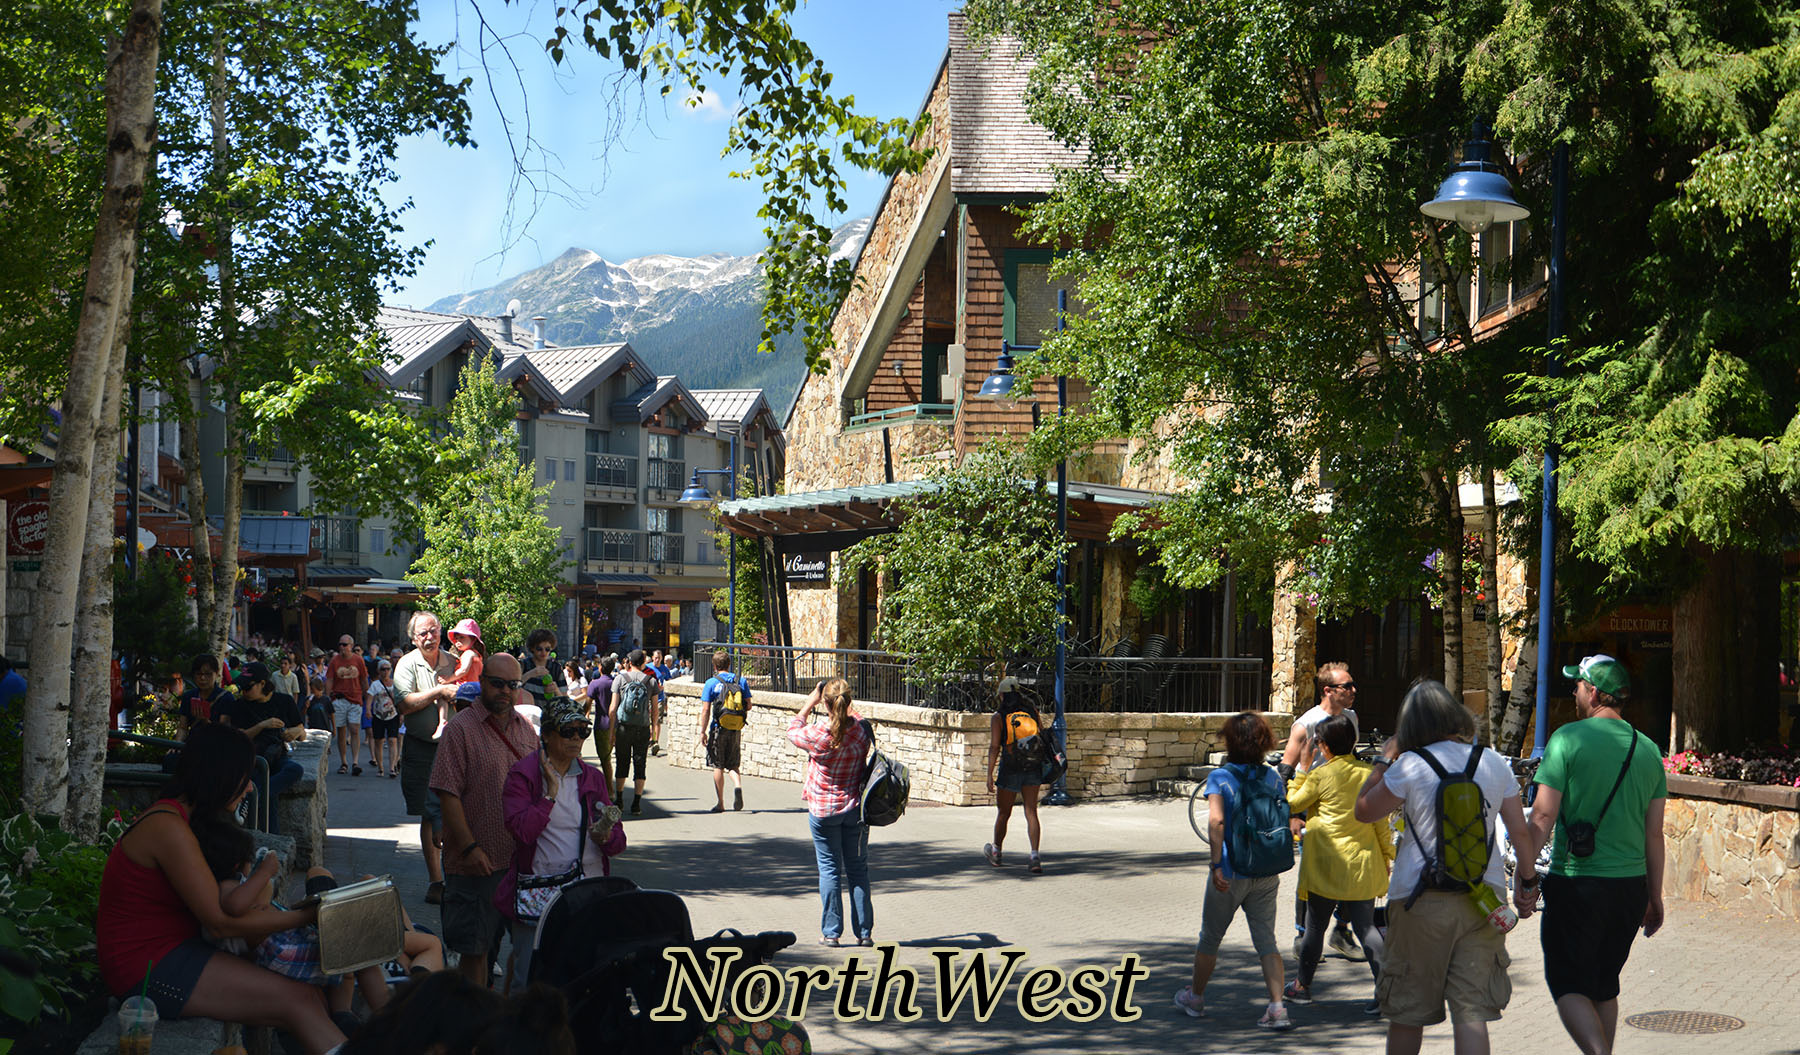
| On the northeast side of Whistler Village is Whistler Olympic Square where many of the 2010 Winter Olympic Ceremonies were held. The below 360 degree panorama is taken from the Village Stroll walkway just before you enter Olympic Square. The Olympic circles are visible on the north end of the panorama. |
|
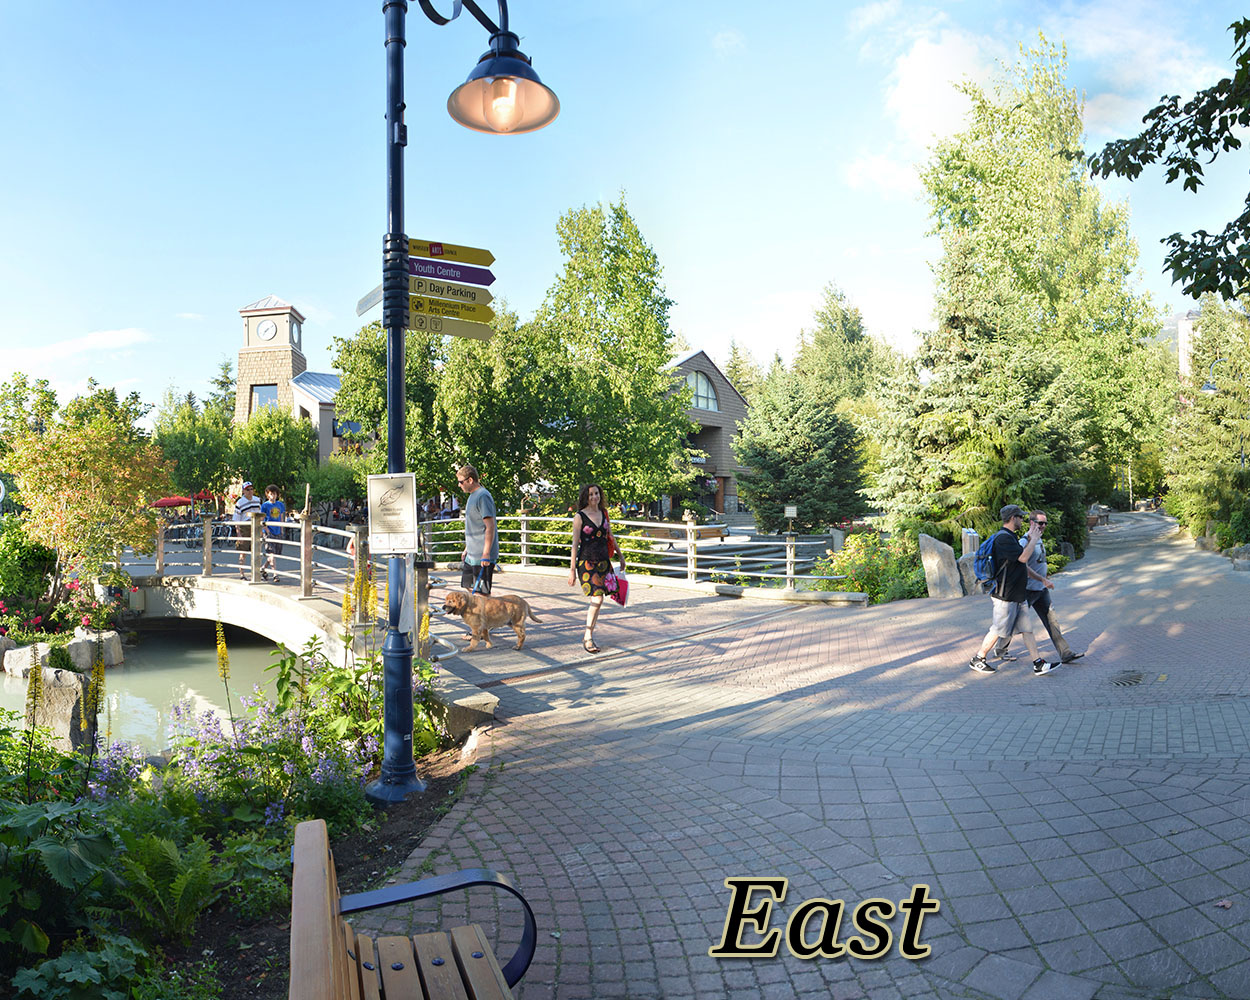
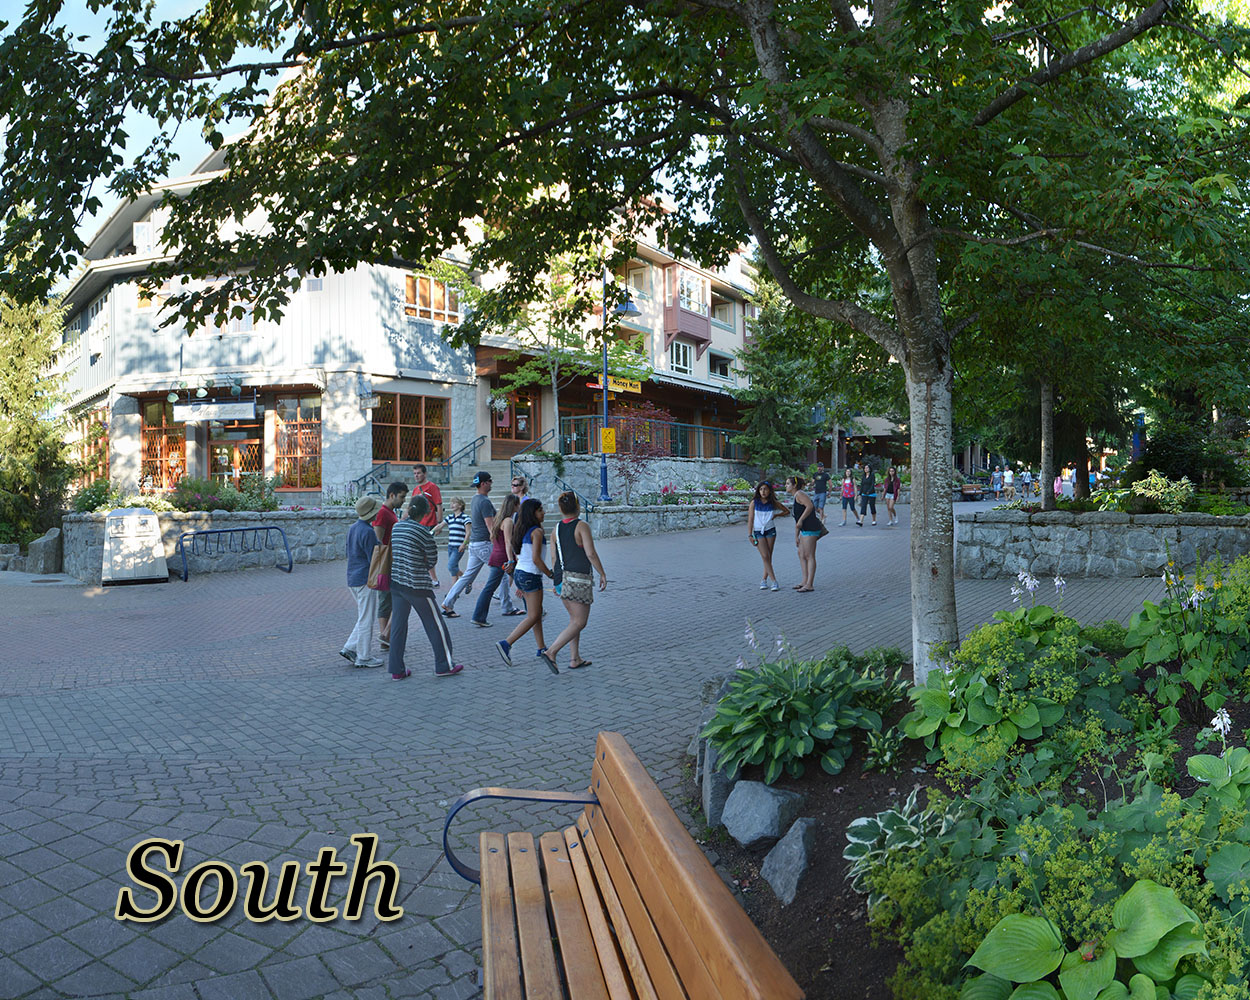
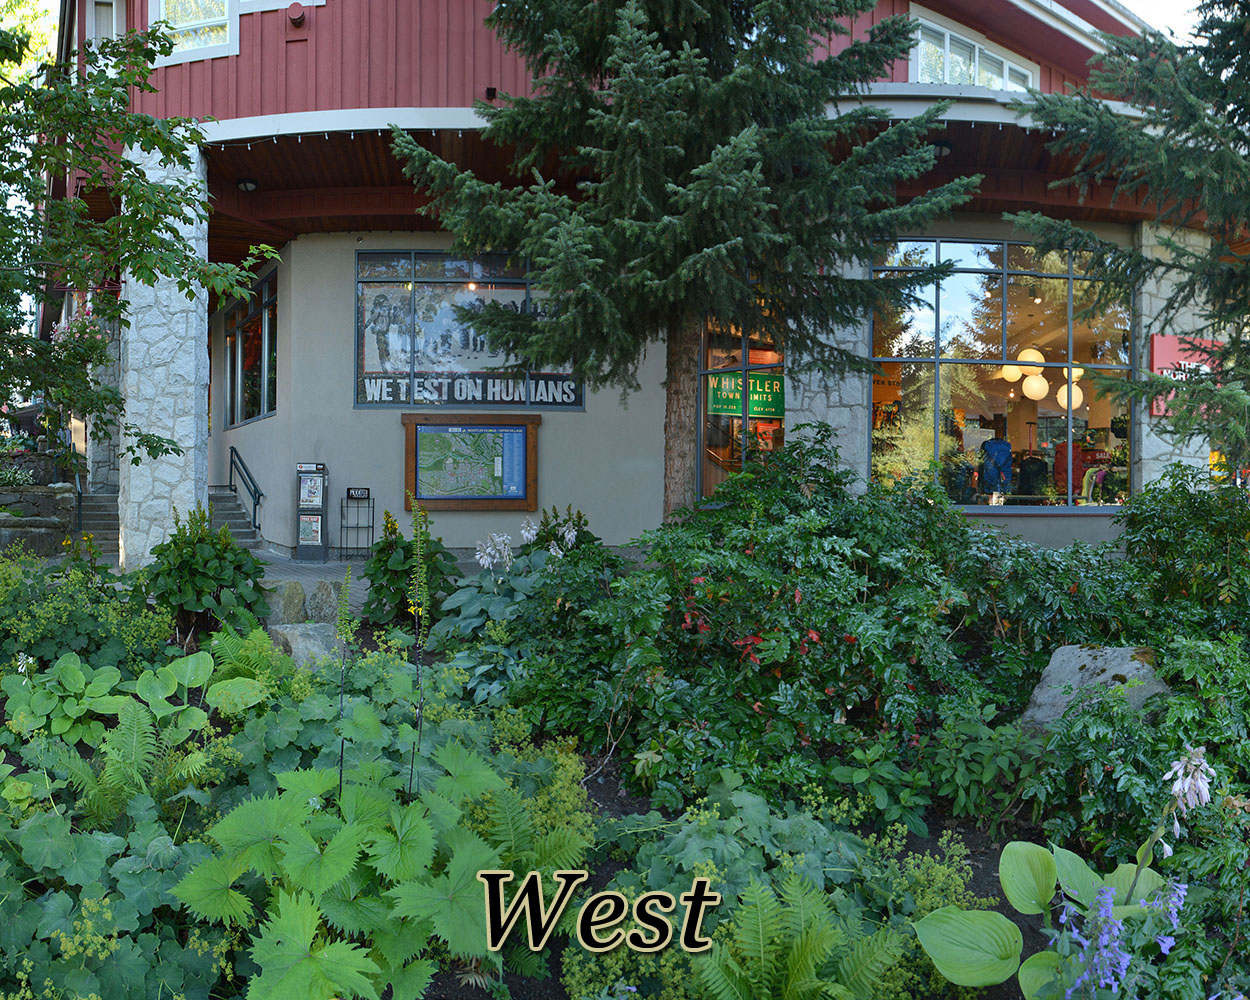
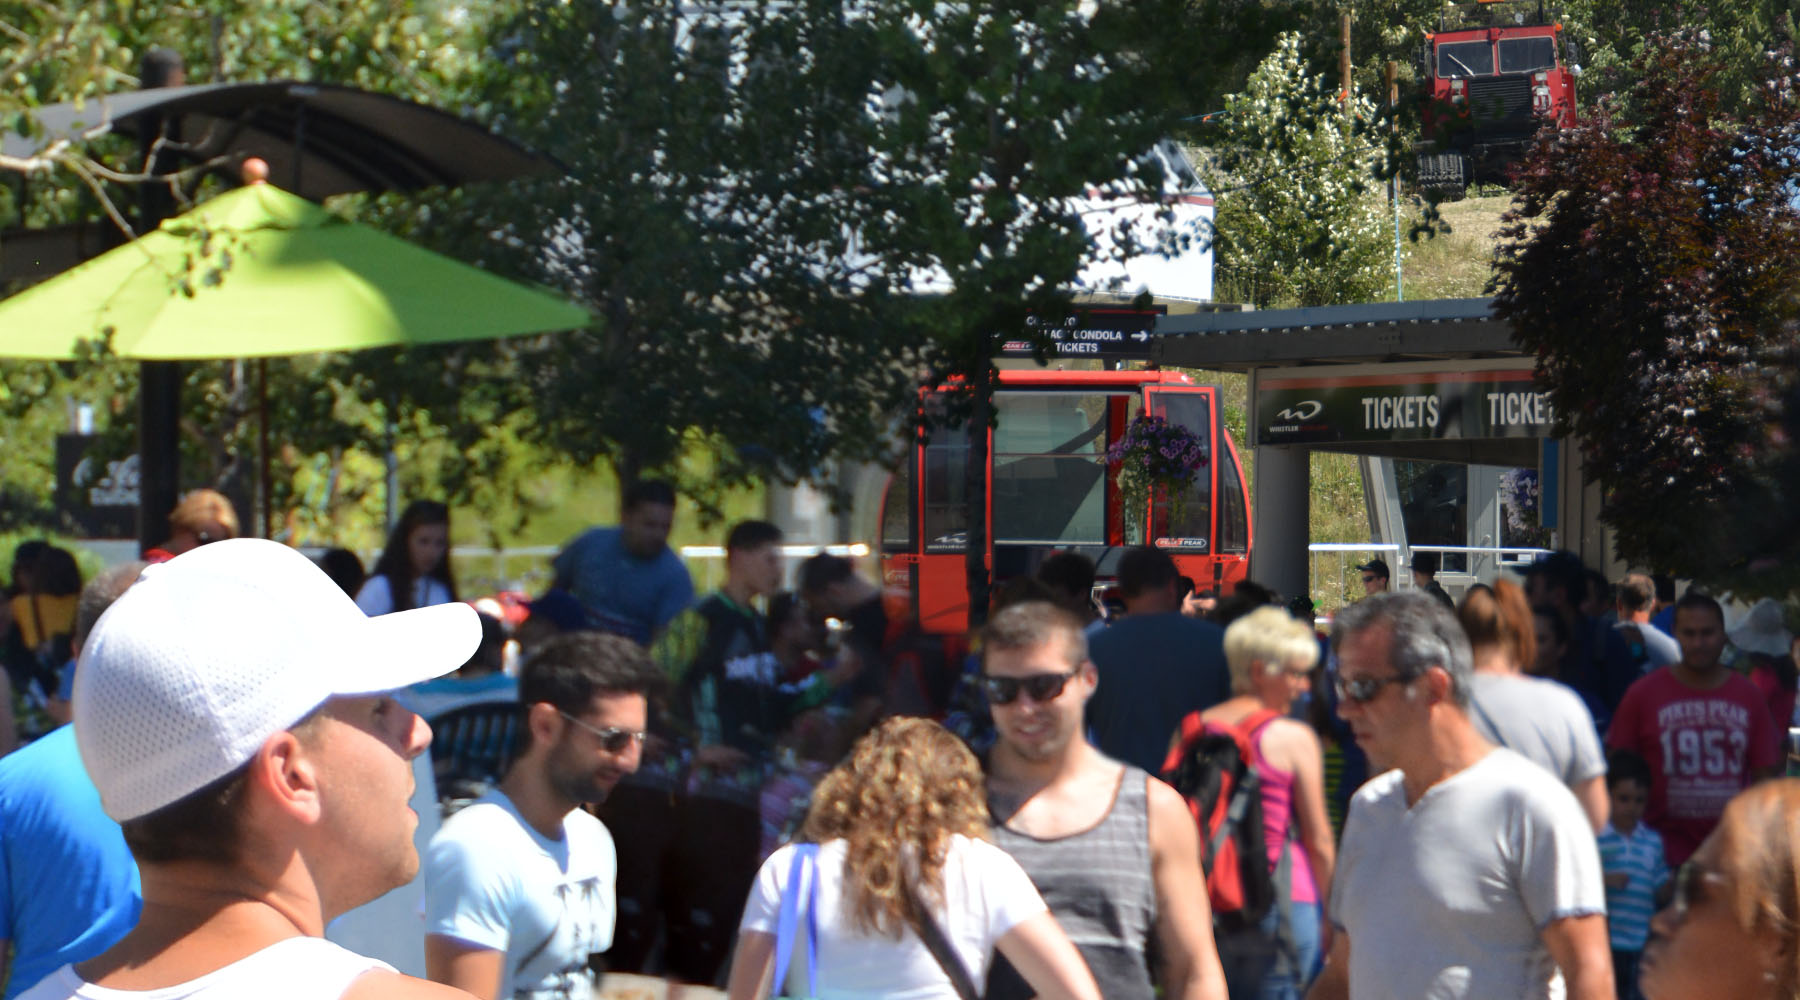
| The below four images zoom into the North, East, South, and West directions of the above panorama. |
 |
 |
 |
|
| |
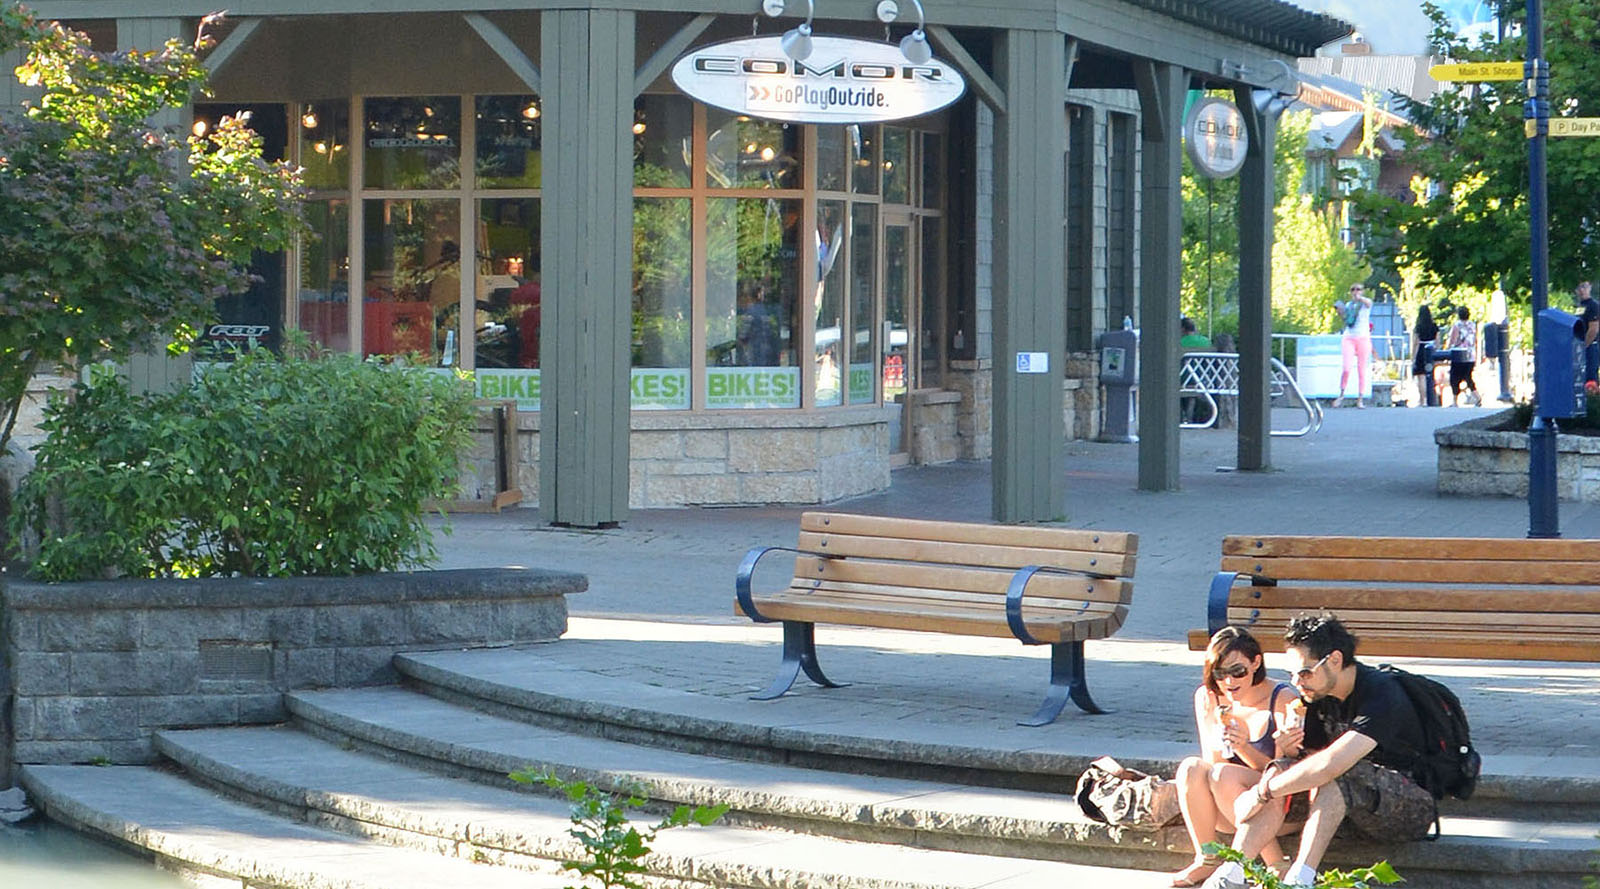
| To show the full detail that the panoramic image has, the below image is a close up of a two people on the bridge (see East photo). |
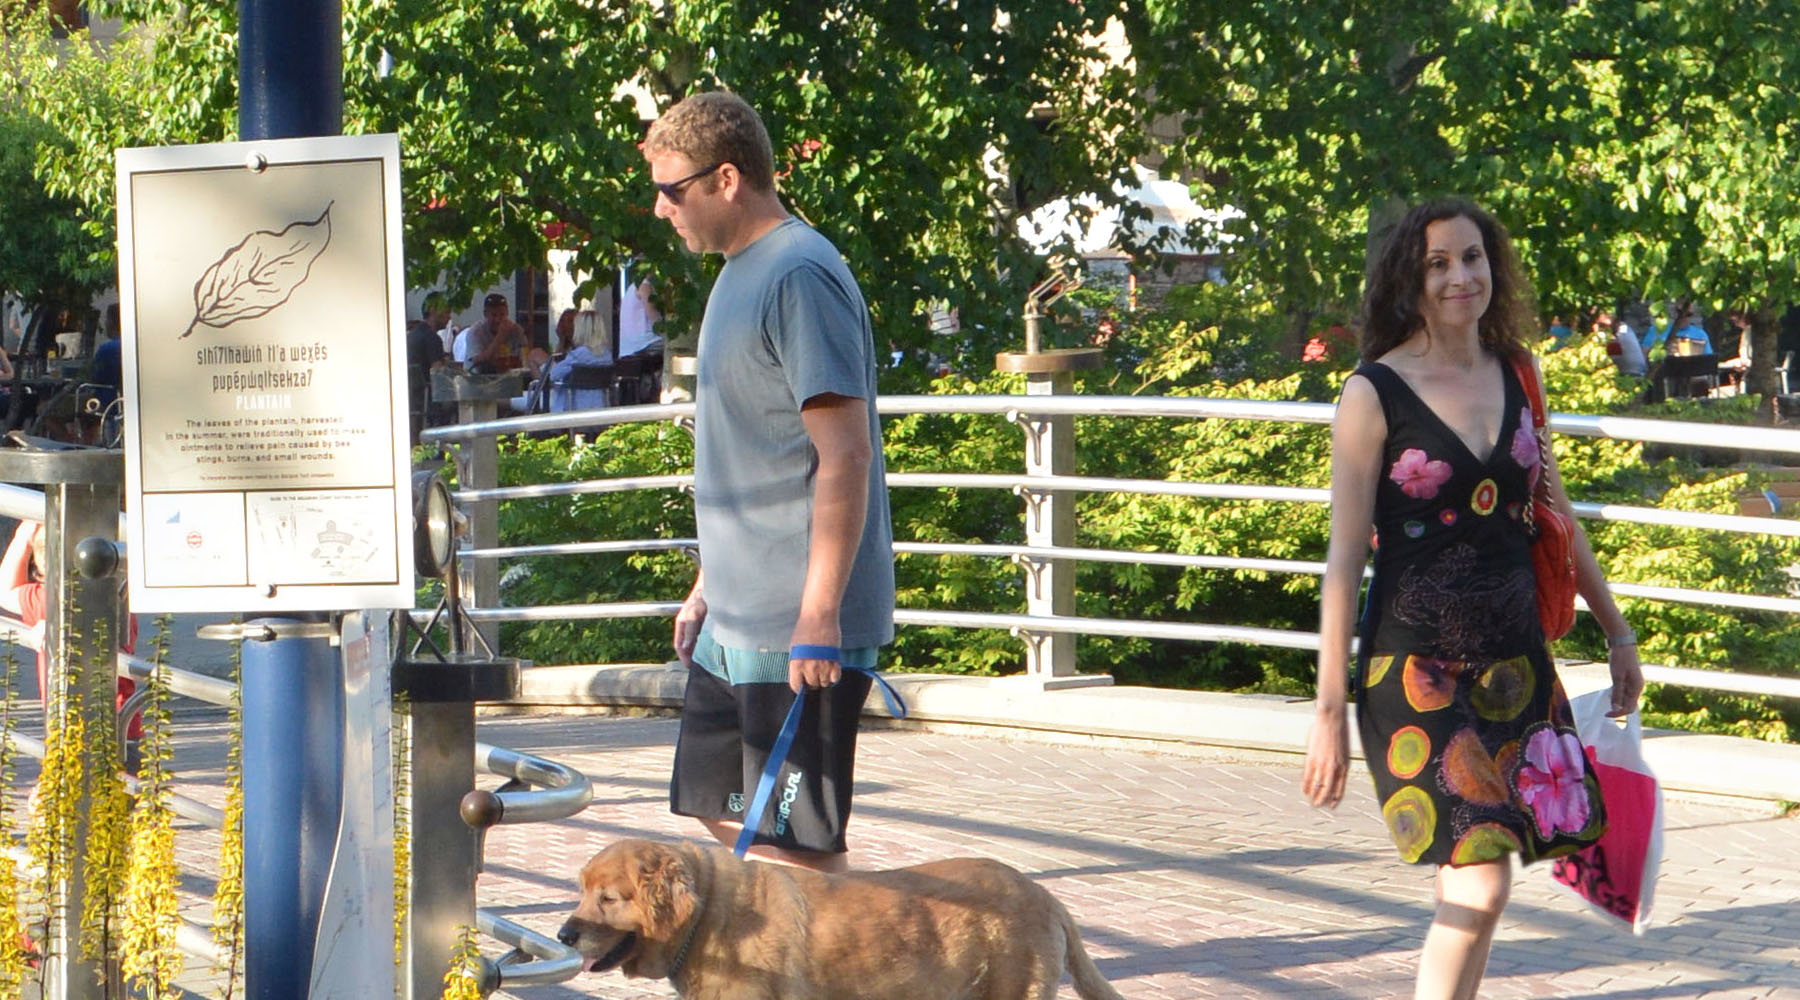
|
| Below is another image that shows the full resolution of the panorama. This close up is of a couple sitting by the water. To see a wider view, go back and look at the North direction photo. |
|
Below are some other panoramas at fairly high resolution (but not as high as the originals used for printing). |


